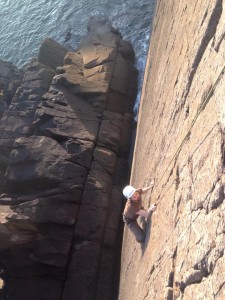
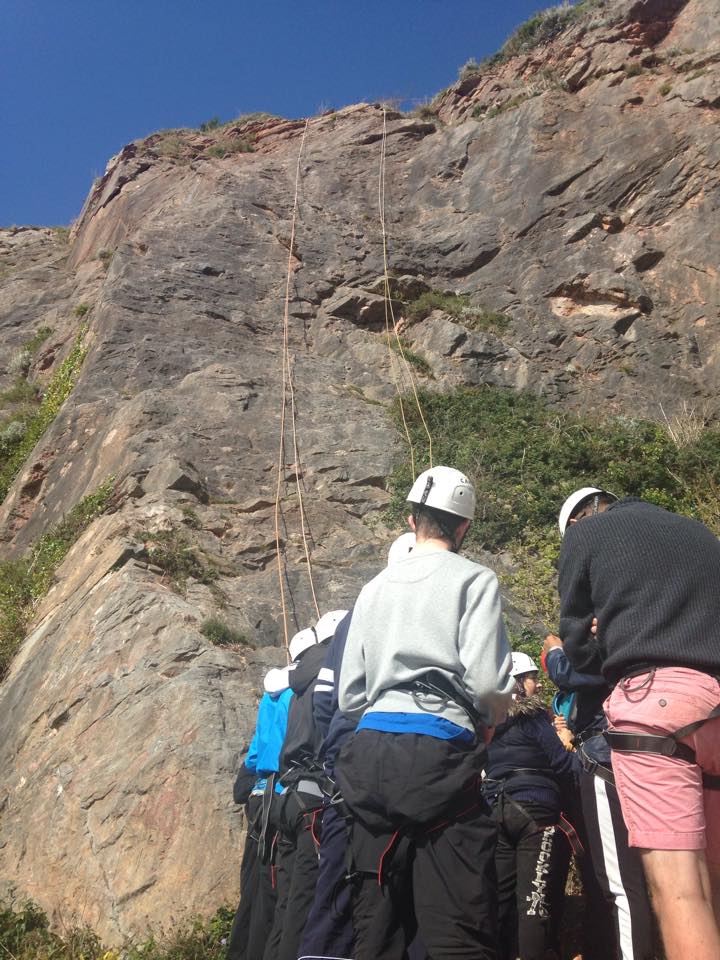
Back in November we had the pleasure of working alongside several local companies to deliver a weekend of adventures to some lucky competition winners, as part of the “Year of Adventure” 2016. Visit Wales had organised a competition where the winners got a weekend away, here in Pembrokeshire… They were put up in local accommodation, fed locally, and taken out on activities for the weekend by local providers. These included Foraging, Kayaking, Coasteering and Climbing. While other local companies were delivering some of the activities, we had the pleasure of working alongside TYF and Dragon Activity Guides to introduce the competition winners to the delights of Sea Cliff Climbing.
Experience sea-cliff climbing in Pembrokeshire in 2016, the Year of Adventure in Wales
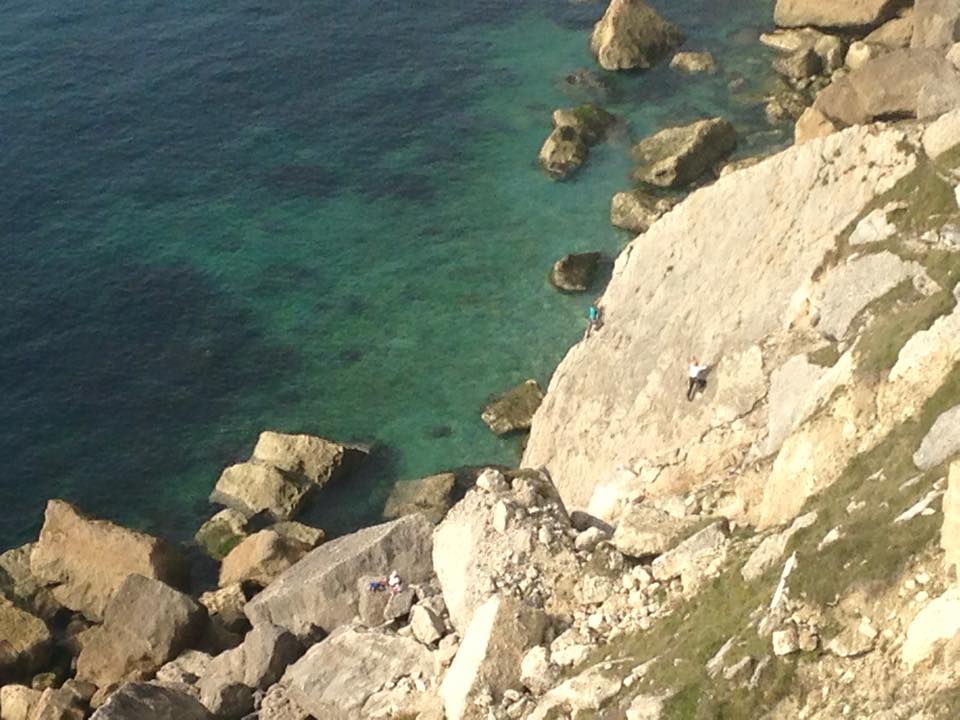
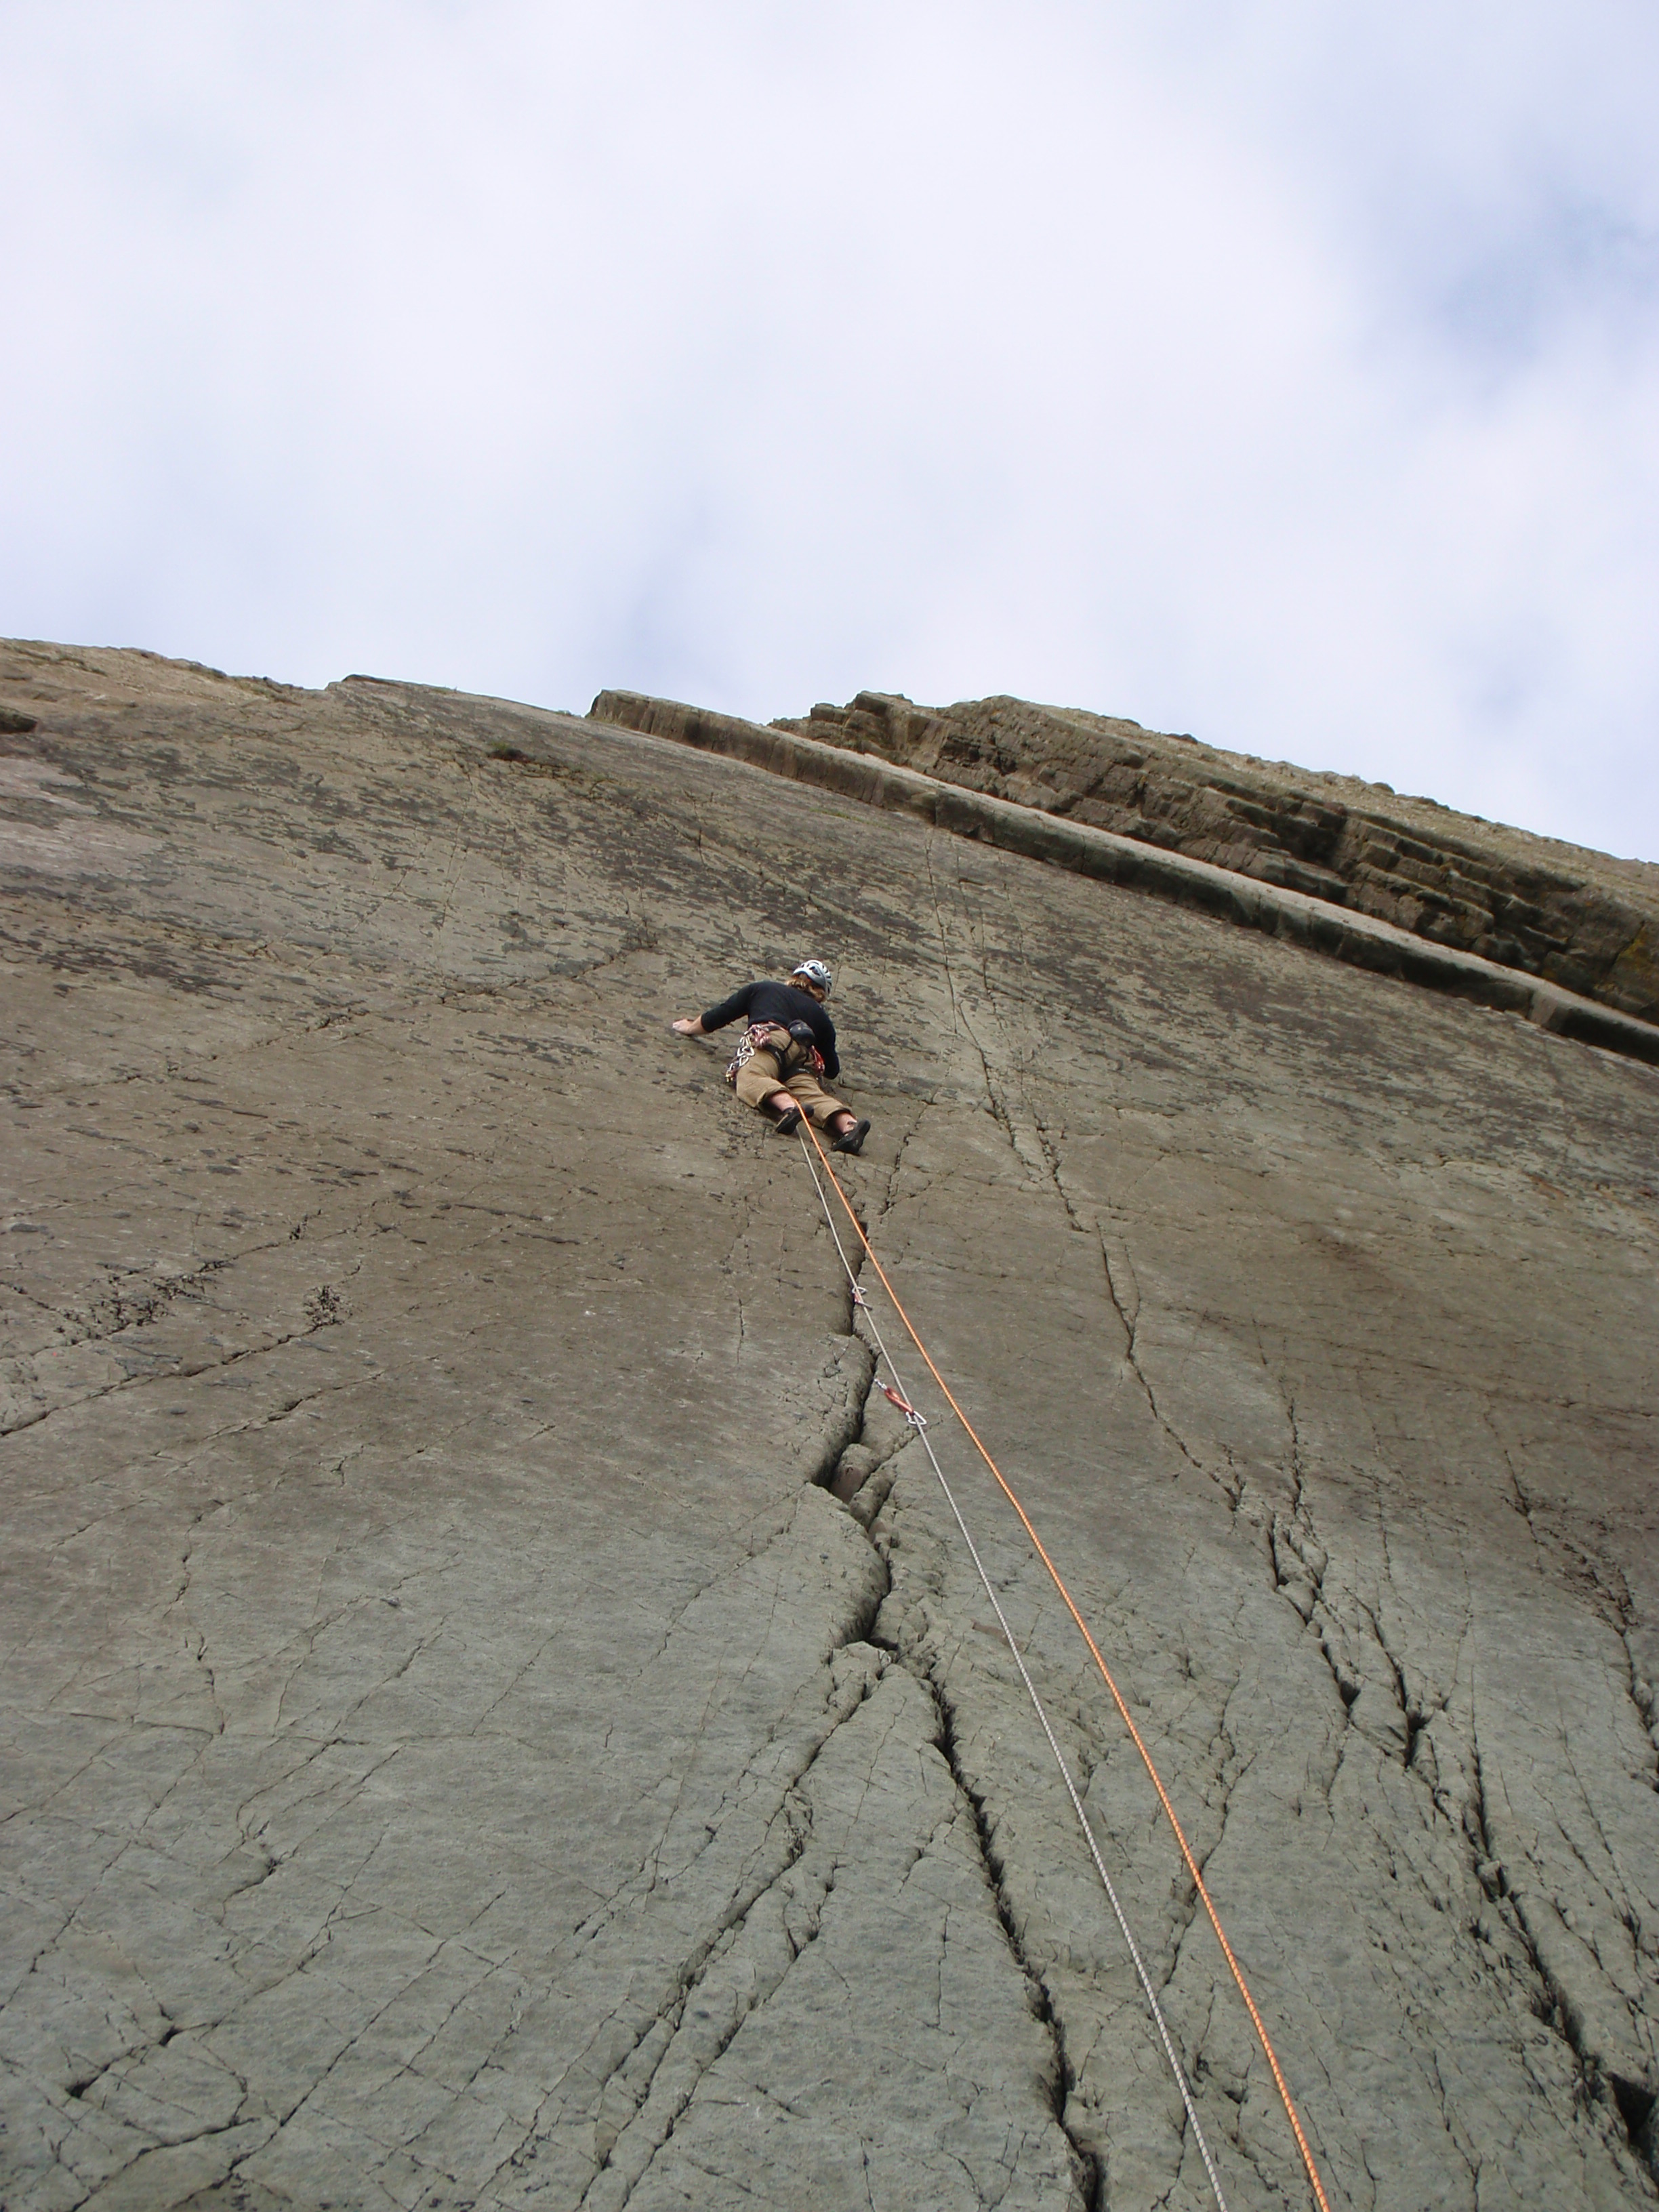
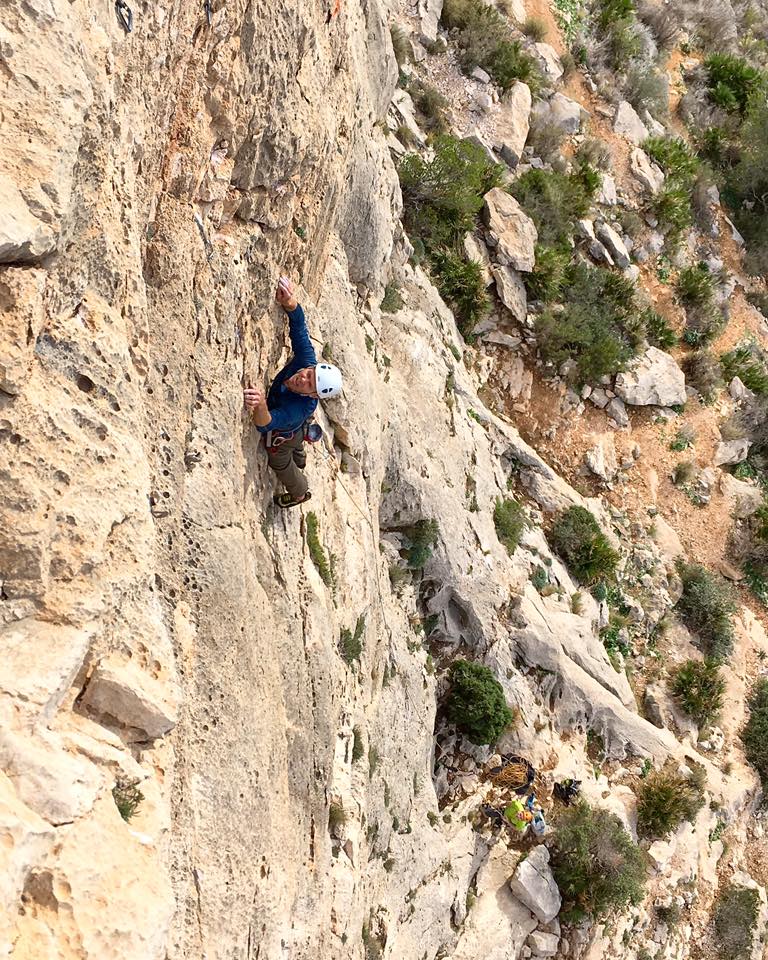
Now we’re pretty biased, but Pembrokeshire is the best sea-cliff climbing destination in the UK, and whether you have never climbed at all or are a seasoned climber, there is something for everyone here. From friendly slabby routes to big steep multi-pitch routes, bouldering to deep water soloing, the county has so much to offer, making it a perfect destination for your climbing holiday. So with 2016 being the Year of Adventure in Wales, now’s the perfect time to come and find out for yourself! Luckily for them, the Visit Wales competition winners had a sneak preview!
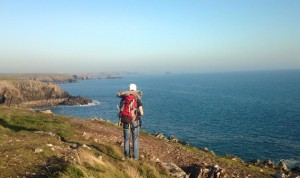
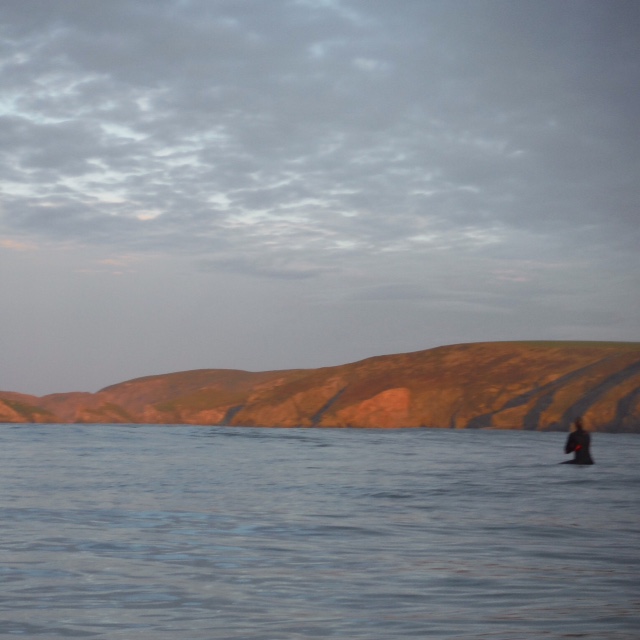
Looking across Pembrokeshire from Porth Clais. There’s a lot of Adventures to be had in 2016!
Over the weekend we ran sessions for total beginners, families with nervous youngsters (and nervous mums and dads!), people that had done a little climbing indoors and even some that had climbed outdoors before. The big thing they all had in common was they were just super keen to be outside! And what a weekend we had! The sun shone, company was great, the weather and sea played ball, good food was eaten and loads of fun was had. We climbed with Orlando who was as nervous as anyone could possibly be, but he conquered his fears, abseiled down the cliff, and by the end of the day had climbed every single route at the crag, some of them pretty tricky! A live changing experience hopefully Orlando – even if you might never climb again?! Then there were the guys that needed pushing that bit further, so we moved on to a bigger rock face, with a more serious feel to it and a committing approach. They just lapped up anything we threw at them and overcame every challenge we could set. Along the way, they guys learn’t the basics of climbing, the technical aspects to it, but also the mental side of things which are super important in our sport. With any luck they’ll be back to Pembrokeshire in 2016, the Year of Adventure, and might want to take the next steps and learn to climb for themselves to enjoy this special place with us!
The Autumn sun setting on the crags of North Pembrokeshire…
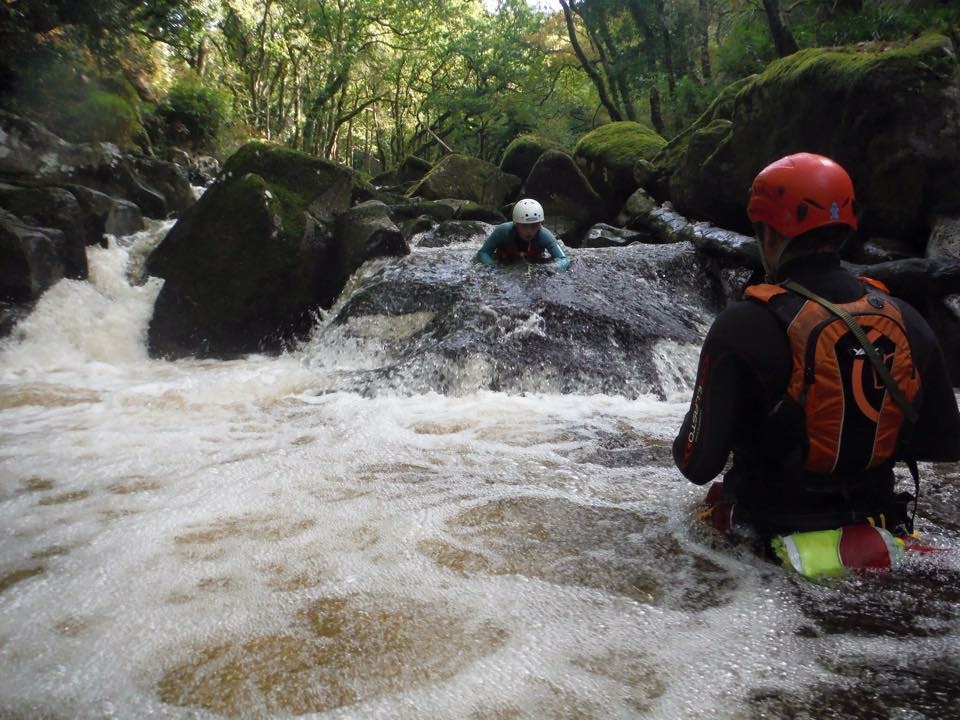
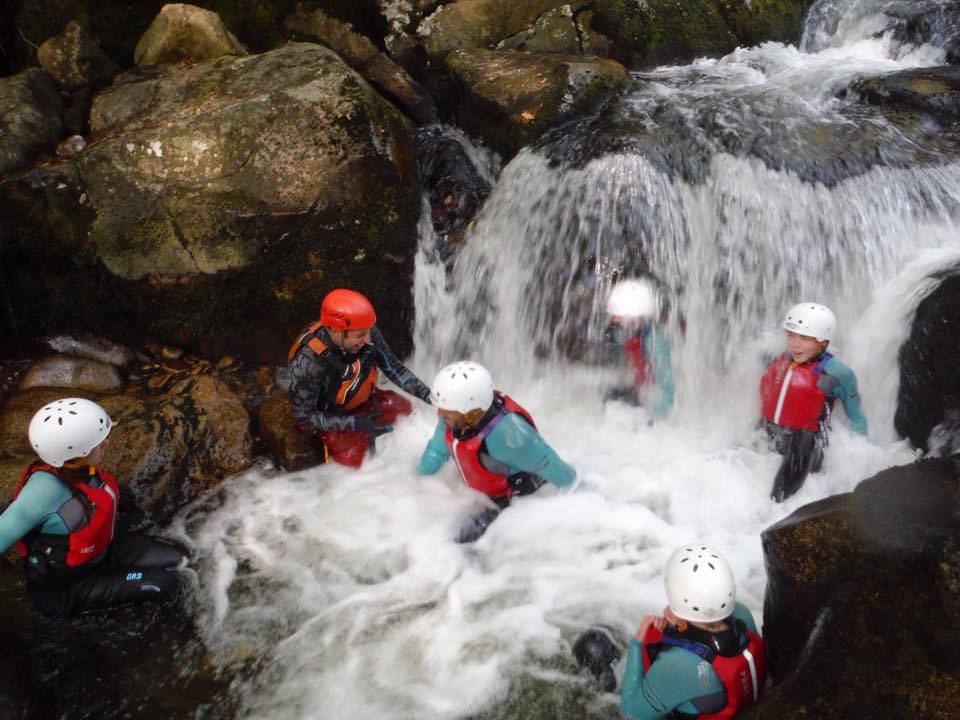
One last week in Devon, again working for Reach Outdoors on their Prince’s Trust team programme. We had a really top team of young people, eager to develop and push themselves well past their comfort zones. We surfed, gorge walked and coasteered our way around the waterways and coast of Devon! The rest of their course with the Prinse’s Trust will be nothing but positive I’m sure. Well done guys…
Gorge Walking in Devon
After a busy couple of weeks between Devon and Dorset, I was super happy to be back home in Pembrokeshire, and with a couple of days off!
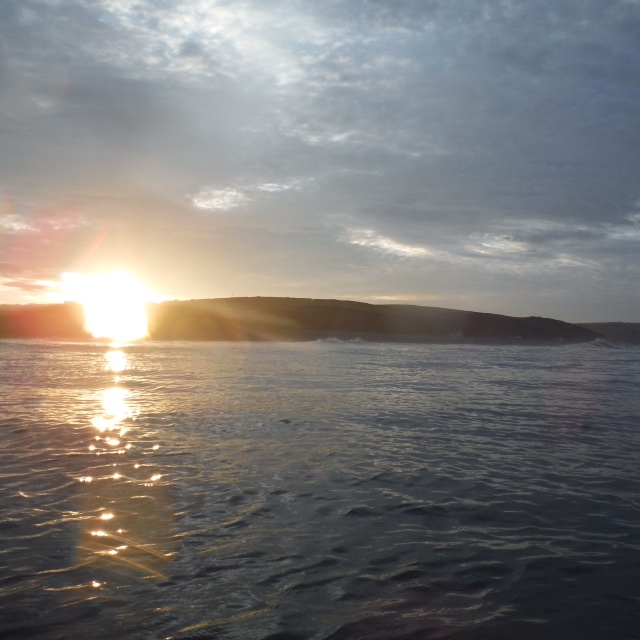
We made the most of our Sunday, up at the crack of dawn to watch the sunrise as we surfed at Newgale, with quality clean waves, then home form breakfast before a long cycle on the road bike to give the legs a work out, stopping for tea and cake at the beautiful Hilton Court, before a spot of bouldering at our local spot, 5 minutes down the road at the awesome Plumstone. There is a great circuit from V0 up to around V4 up there, with harder eliminates. Well worth a visit if you’re in the area…
Sunrise from the sea, over Newgale
Waiting for the next wave at Newgale
Bouldering at Plumstone, Sophie on a nice V0 here…
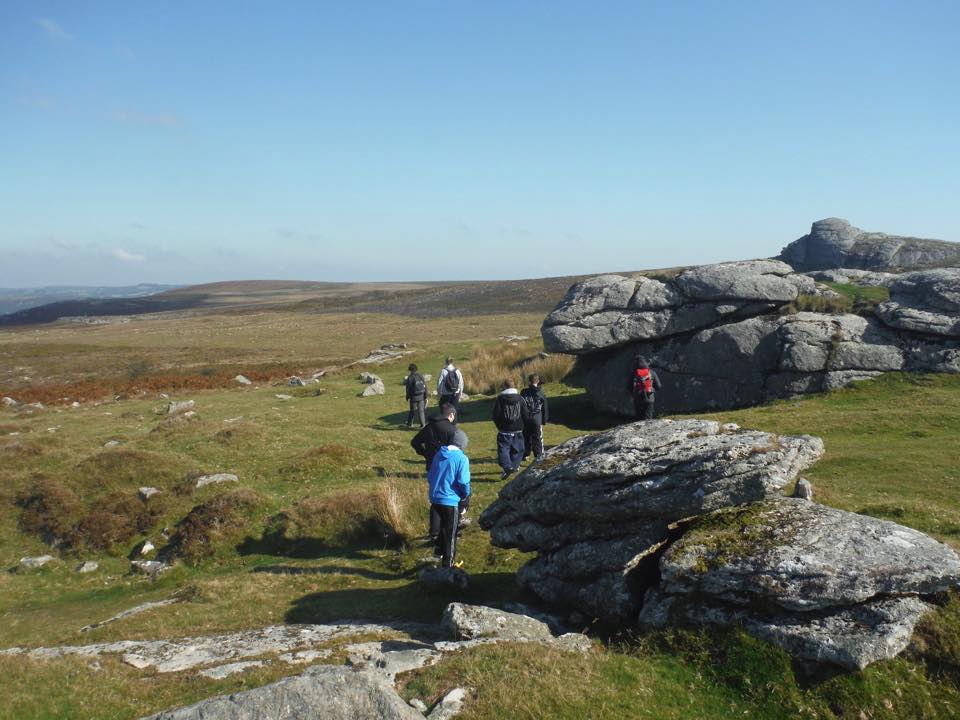
This week I have been working for Reach Outdoors, with the Prince’s Trust in Devon. We have been with a fantastic bunch of young people, looking at helping them gain confidence, develop team work and leadership and improve their communication skills. all through outdoor activities and a planning and review process. These weeks are always super rewarding (sometimes a little hard work too!), but this weeks group were awesome. Throughout our week with the Prince’s Trust in Devon, we have been walking on Dartmoor, Gorge Walking and Rock Climbing amongst other things. The weather has been unreal, especially for the start of October! Lets hope next week is even half as good! Though it does look like the weather is on the turn…
Climbing with the Prince’s Trust in Devon
Gorge Walking with the Prince’s Trust in Devon
Walking with the Prince’s Trust on Dartmoor
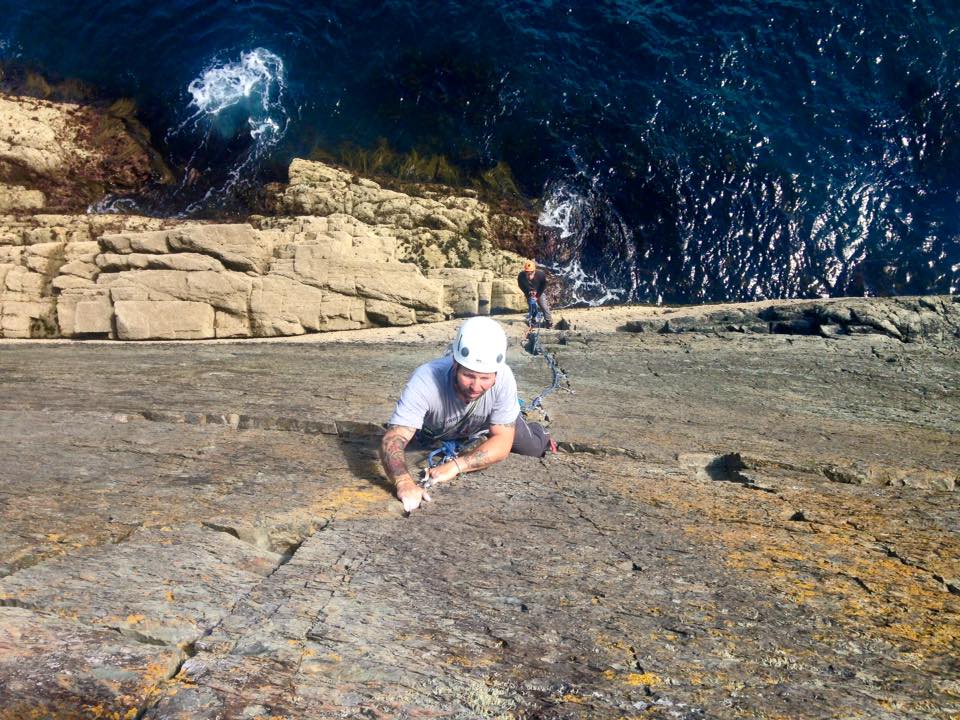
This weekend has been spent in Dorset, getting some sunny sport climbing done on Portland. Coming from Pembrokeshire where every trip entails an adventurous abseil into a big crag for some trad climbing, it was great to rock up and do some relaxing sport climbing after my week with the Prince’s Trust in Devon…
What a great couple of weeks it has been! I’ve been too busy climbing, working and exploring in Pembrokeshire to write any blog updates, so here is a sum up of the last couple of weeks, and the bank holiday weekend climbing in Pembrokeshire…. The weathers been almost non-stop good, great tides and magical sunsets, great clients and new routes climbed to boot!
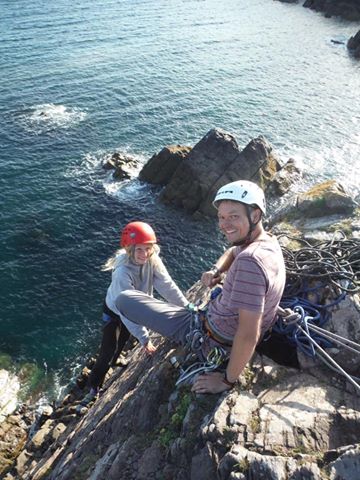
We had a great day with Sicco and Hannah, a father and daughter from Germany (who thankfully spoke perfect English…). Hannah was psyched to get on any climb she possible could, and at only 9 shows great promise for the future should she keep it up, whilst dad Sicco had done loads of sport climbing previously – so he cruised his first trad lead climb here on the Pembrokeshire sea cliffs.
Sicco happy having led his first trad route!
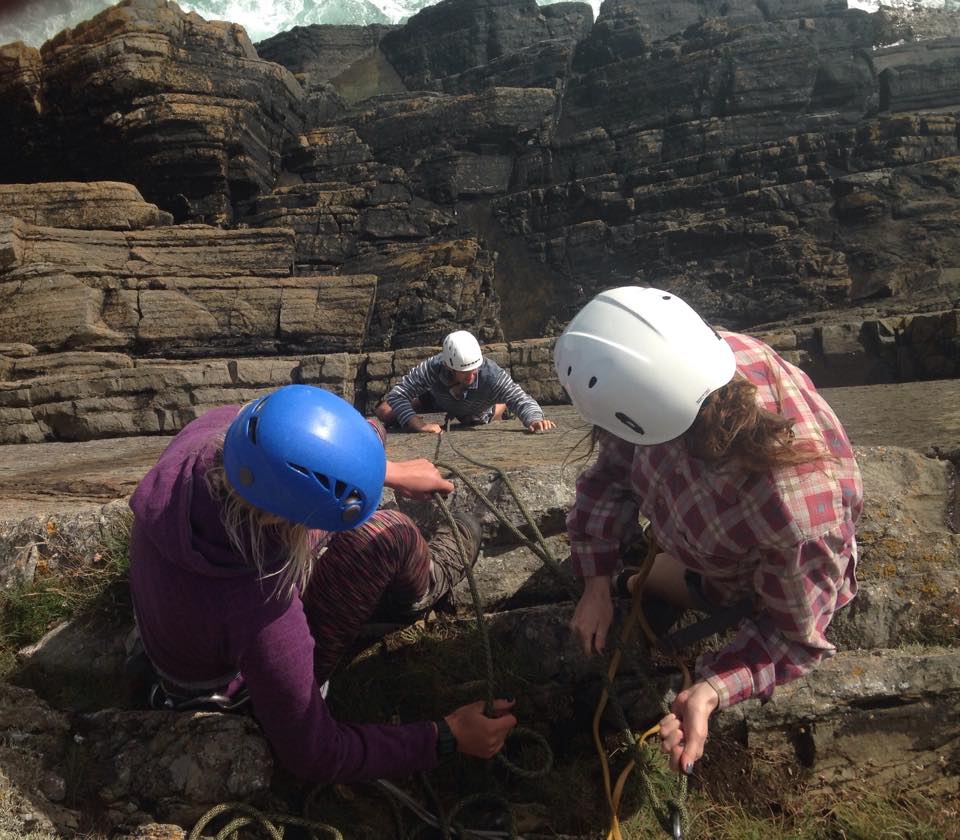
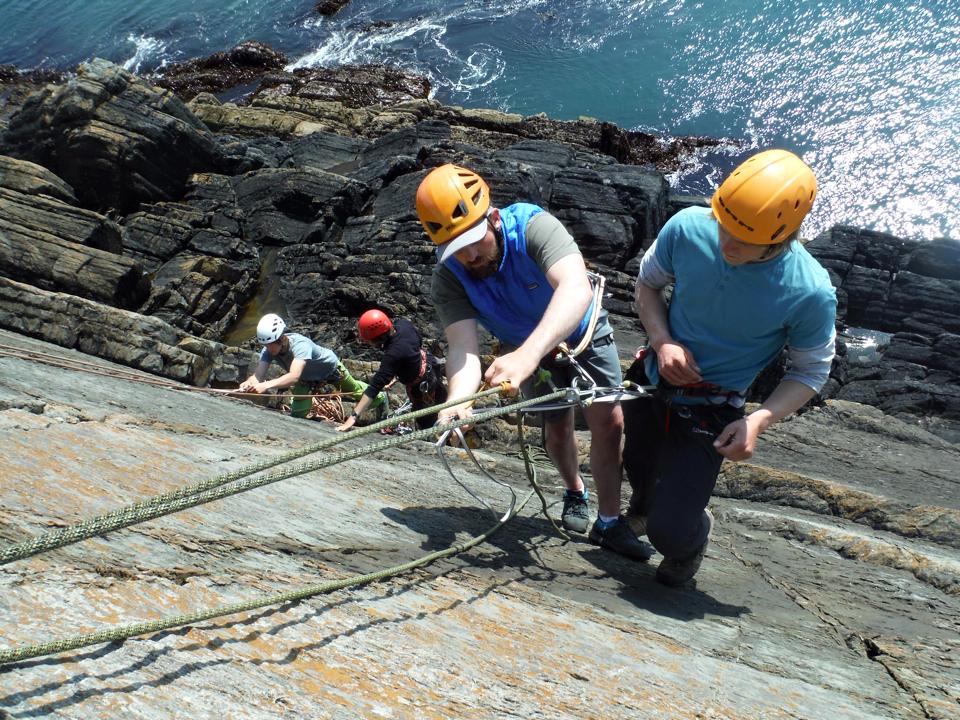
We had a day out with some local instructors who have got their SPA assessments coming up. This award lets them take groups of novices onto single pitch crags, a vital stepping stone in the ladder to being a successful outdoor instructor. We went through top and bottom roping, group abseils, and problem solving. We were luck to have some willing guinea pigs come along for the guys to practice on too!
Teaching SPA Skills to Instructors
It’s almost a tradition now for people to spend the bank holiday climbing in Pembrokeshire, and with the release of the excellent Climbers Club Pembrokeshire guidebooks, we are definitely noticing the area is getting busier, with crags that were relatively unexplored before, now having frequent visits.. Luckily for us we know more secret spots (and whole crags with no routes on!) so we were able to escape the crowds with Si and Elliot on a learn to lead course over the Bank Holiday Weekend…
Seconding a climb in Pembrokeshire
We visited several crags on the first day, looking at loads of belays and rope work, gear placements and of course climbing heaps of classic routes, and on the second day, from being relative novices, both Si and Elliot were doing their first trad lead climbs. Great effort guys and thanks for a great weekend with good company…
Lead Climbing Course in Pembrokeshire
I was lucky to have bank holiday Monday off for a rare change, and was rearing to get out and have a climb, and being super sunny and warm, a dip in the sea. Not many places in the work you can go on what is one of the busiest tourist days of the year, and have the crag to yourself, right by the turquoise sea, watch Porpoises and seals and swim in the warm(ish!) water to cool off as it’s too hot! Magical! Gotta love bank holidays in Pembrokeshire climbing with the cliffs to yourself!
Stunning St David’s Head
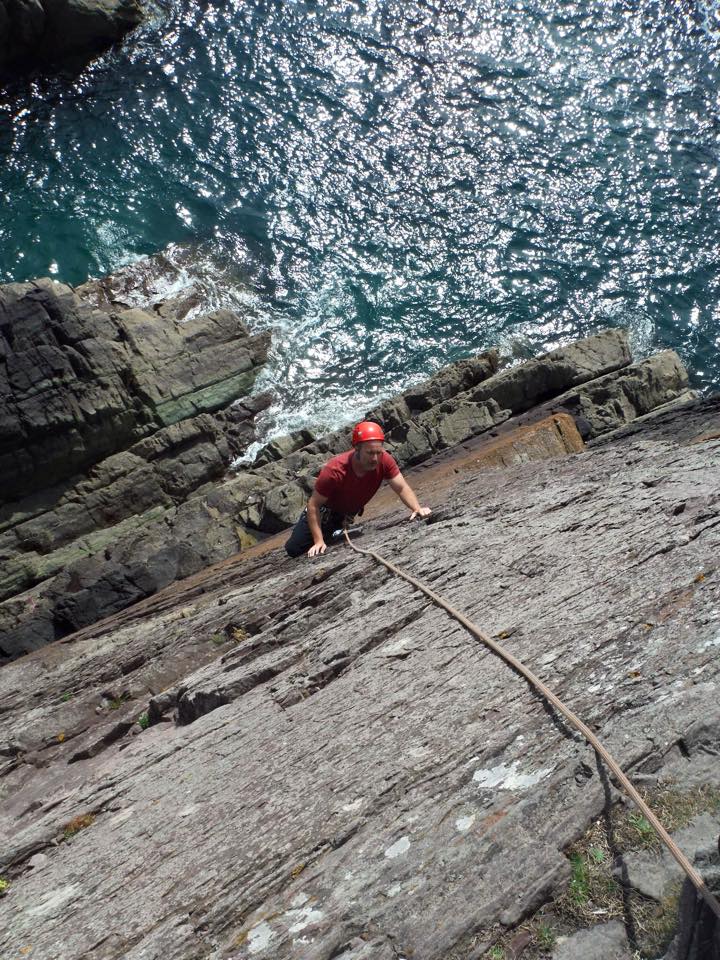
Once the crowds had departed from Pembrokeshire, the weather was still awesome, and the tides perfect for some exploration. We spent the day looking at lead climbing skills at a very unexplored crag near Newgale, with some excellent established routes, great to learn to lead climb on, it should be more popular – but we’re not complaining! We had the pleasure of doing a couple of first ascents during the day, the most memorable being up a pinnacle, with a proper pointy summit necessitating a counterbalance abseil decent. Throughout the day our only company was a couple of seals that watched us pretty mush non-stop… I’m excited to get back here and check out more of the new routes…
This weekend I’ve been down in Dorset, working on a “learn to sport climb” course for Freeborn Climbing. We had 5 fantastic people who had varying levels of experience, all progressed massively over the two days. It makes a nice change for me, as we have virtually no sport climbing in Pembrokeshire, so it was great to clip some bolts in the sunshine!
Sport Climbing in Portland
Over the course of the weekend we climbed loads of great routes, initially looking at a focus on belaying, climbing movement and efficient technique, alongside the art of clipping quick-draws!
Teaching threading lower-offs at The Cuttings
Once the team all had the skills to thread lower offs and felt confidant to lead, we climbed loads of routes to reinforce the skills…
Coaching leading on the sharp end whilst sport climbing
We rounded up the weekend with some problem solving and avoidance. Hopefully everyone will be confidant to get out themselves now and get on the sharp end! Awesome effort in hot weather!\
Following on from last weeks starting Trad Climbing Kit Article, here’s a run down of what kit you might need to move into the realms of Multi-Pitch Trad Climbing:
By now you’ve done plenty of single pitch climbing, and your chomping at the bit to get onto some longer routes, right? Hopefully you’ve acquired the skills to safely and correctly place gear, how to extend it properly to reduce rope-drag, and multiple ways of attaching yourself into a belay as well as probably having done some abseiling. The transition to trad multi-pitch climbing should be a fairly smooth one and progress should be fairly rapid, as you’re just adapting skills you already have…
Now you’re getting on longer routes, it makes sense we might need more gear. All the previous information on kit holds true, so if you’re playing catch up check out the previous article: trad starter rack. All we really need is some duplicates of equipment we already have, plus perhaps a few new bits and pieces. This article is assuming we’re still looking at easy to mid-grade routes, and we shall look at specialist kit for harder routes another time…
Multi-pitch Climbing Skills in Pembrokeshire
So, first up, get some more nuts! We started out with a single set of nuts, now we will want to double them all up. It might be an idea to go for the different brand to what you went with before. Slightly different shapes (even though the sizes are the same) give you more options. The DMM nuts tend to be a bit fatter and curvy, whilst Wildcountry are slimmer and straighter. I like to rack them in 4 size sets on separate carabiners. Roughly 1-3, 4-6, 7-9, 10-11. Too many nuts on a crab gets messy.
Last time we looked at hexes. Now I’m not saying scrap them, they are great on some traditional mountain routes, but now it’s time to think about getting some cams, which can make hexes a little redundant. It’s definitely best to leave these till now, as you really need to serve your apprenticeship placing really decent passive (nuts, hexes – no moving bits) protection first. Cams are what we call active protection (moving parts) and far, far too many people place them in a totally useless way as they simply don’t understand how it works. Placed well, in decent rock, cams are awesome bits of kit, and vital bits of kit in certain places (Stanage, any Gritstone or Granite crag etc…). You may be limited by cost as they are expensive, but in an ideal world we would get a set of at 1-4 including half sizes ( ie-7 cams!) but obviously that’s a retail value of mega$$! As a minimum I would try and get sizes 1,2,3 and you can build it up over time. Perhaps go in half’s with your climbing partner? Of the many brands out there, I would look at the excellent DMM Dragon, with useful extendable sling, or the Black Diamond Camalots. The golden rule with cams is extend extend extend! You’ll cry if they walk back into a crack to be lost forever or the rope drag inverts them and they get stuck!
We’re going to need to splash out on new ropes too. So far, we’ve been climbing on 1 single rope, which is great for sport climbing, indoors, and straight up trad climbs. There’s a good chance now on the multi-pitch climbs our routes will wander back and forth, with protection all over the place, and there’s a good chance you might start looking at retrievable abseils to descend from the crags. SO what we need, is a pair of half ropes. These are indicated with the rope mark, a circle with a half symbol inside (1/2). Using 2 ropes allow us to reduce rope drag (by clipping the rope nearest the straight line of kit we place), do a full length retrievable abseil, and also put lower impact on the kit (not that we’d be placing gear of dubious quality though eh?!) For UK trad, get 50 or 60m ropes – oh and make sure they are different colours! I’m a big fan of the offerings from Mammut.
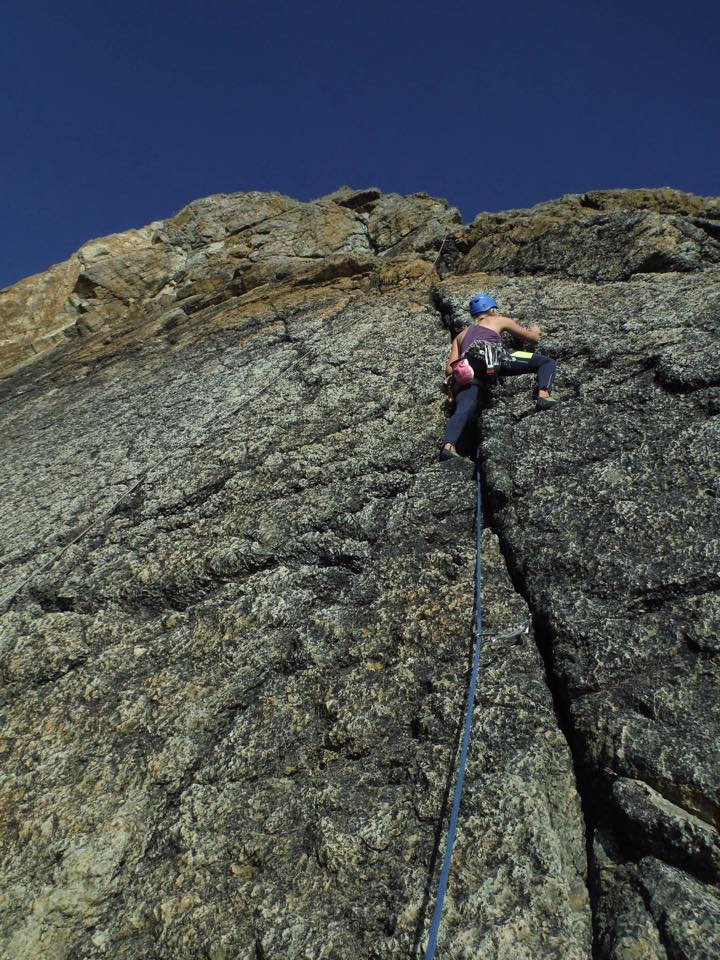
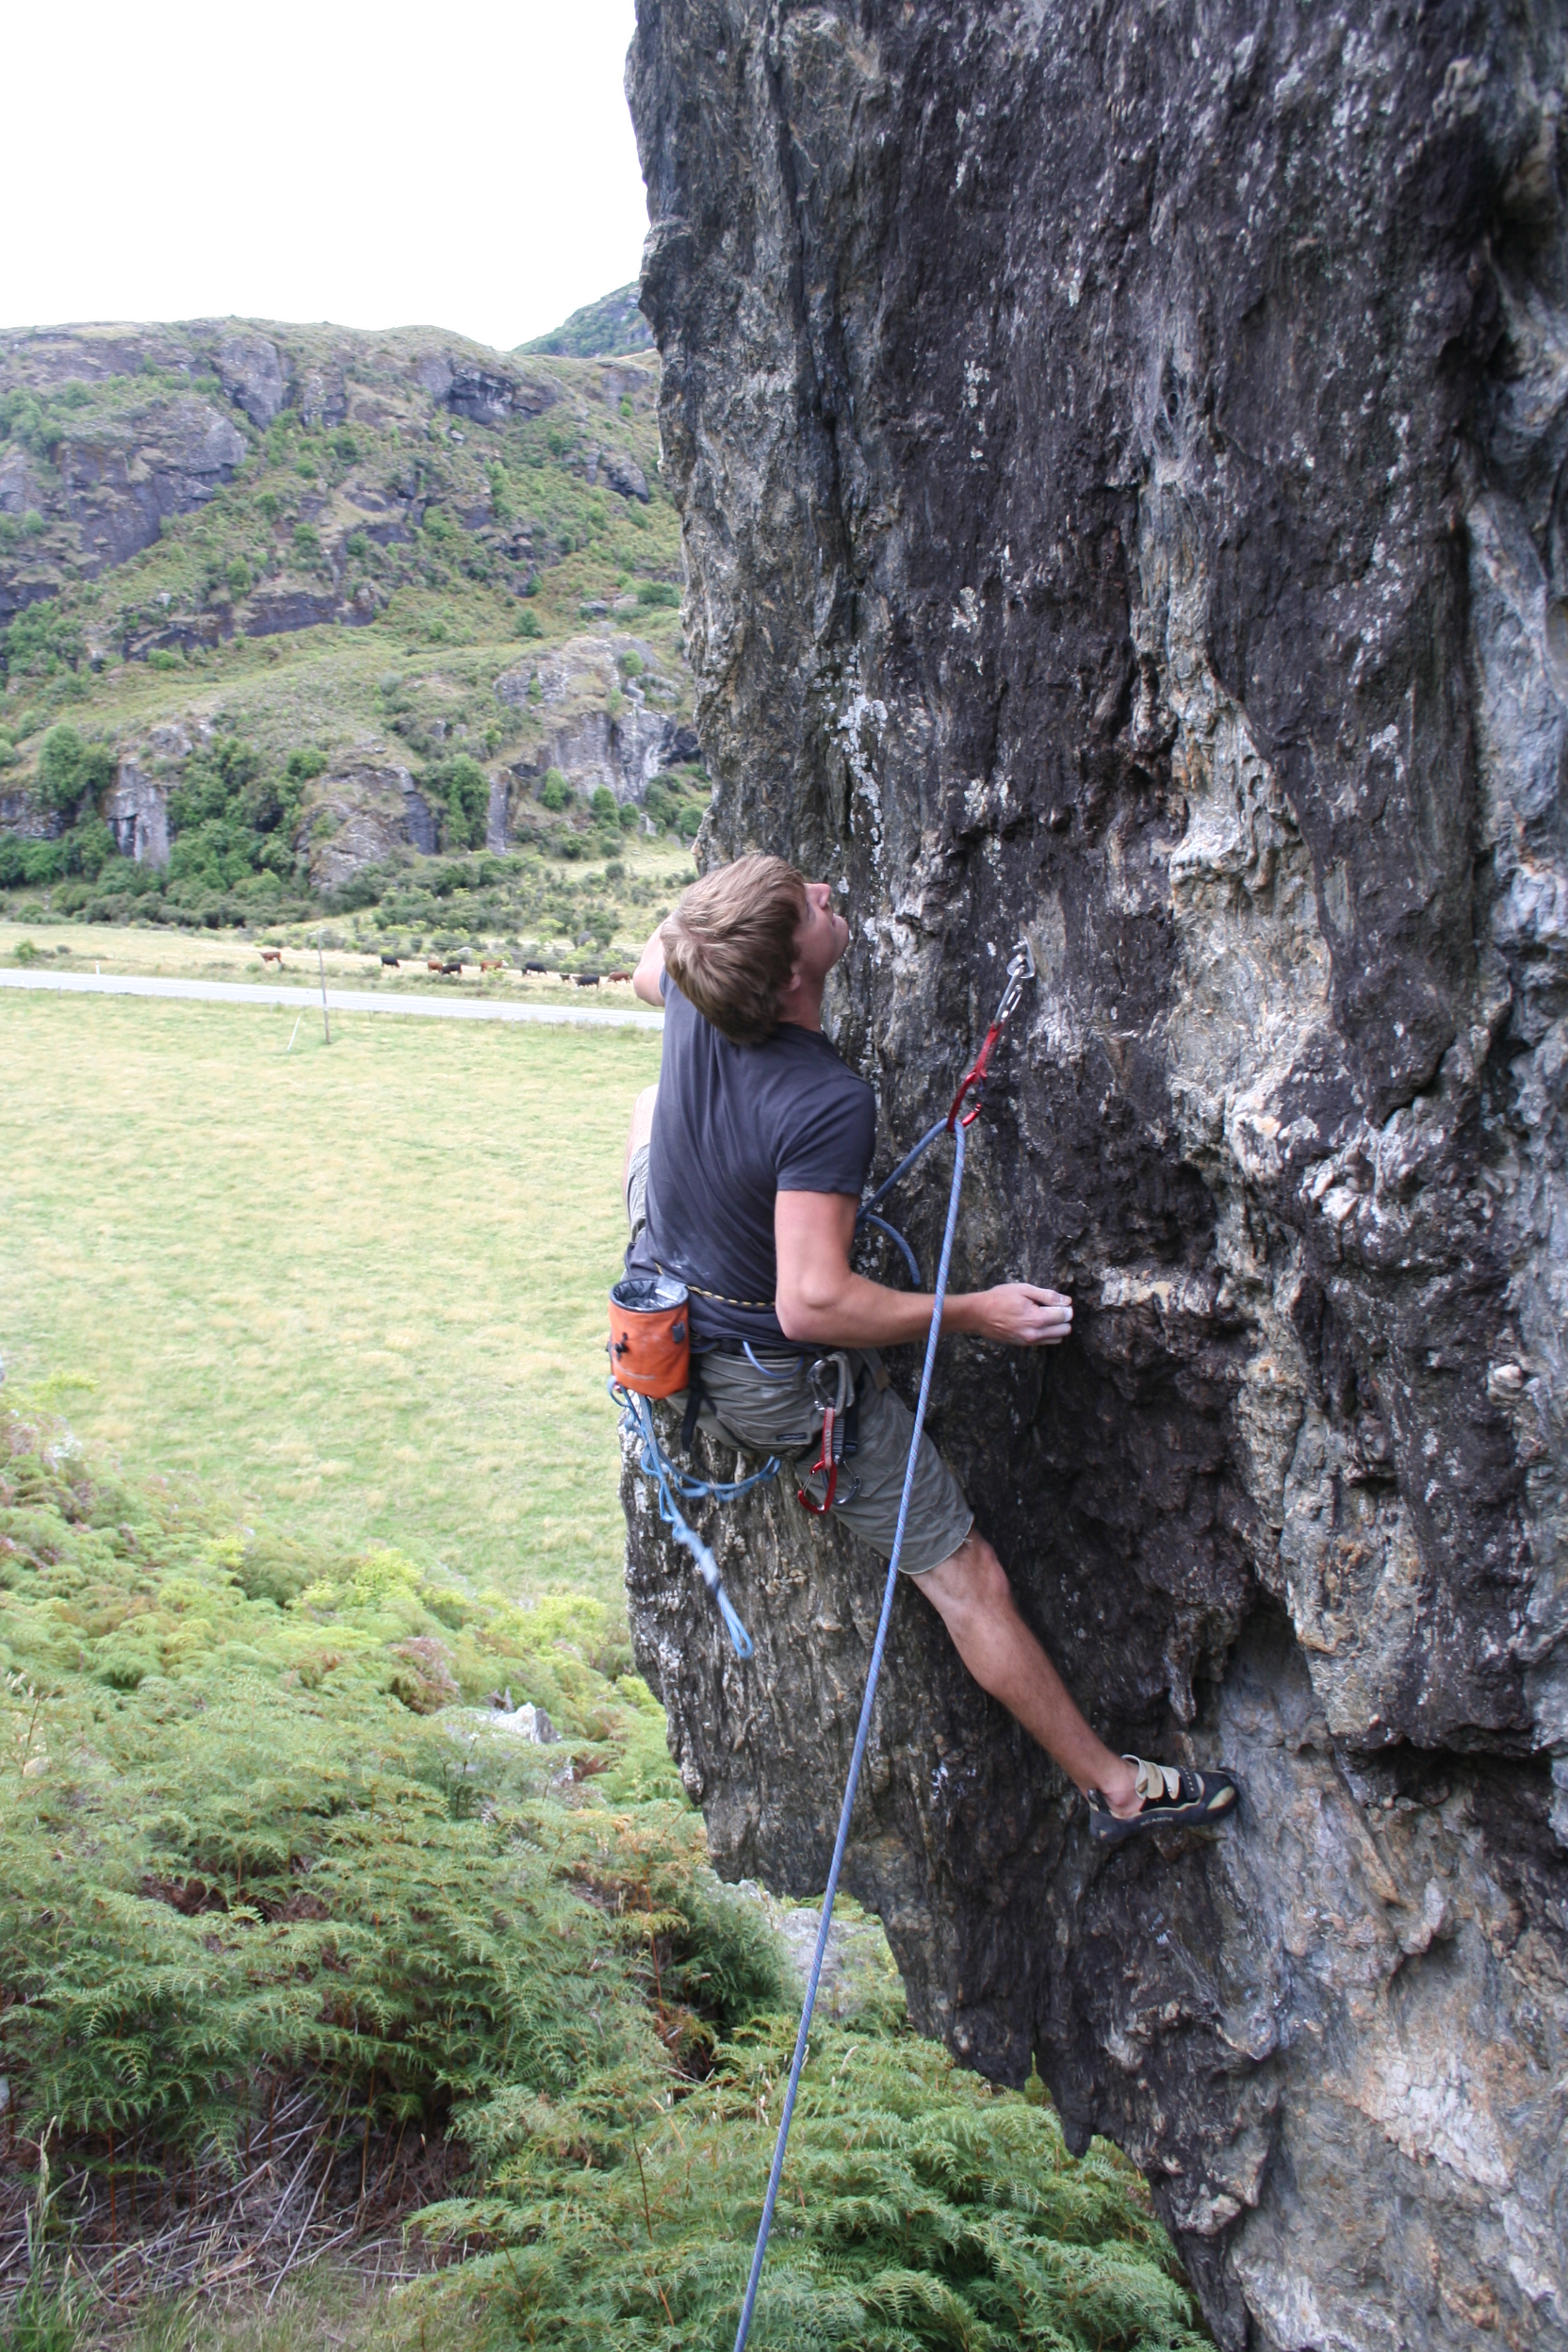
About to step right into the next crack, you can see how using 2 half ropes can reduce rope drag… Route: Amorican – VS 4c – One of the best VS’s anywhere! Caerfai Bay, Pembrokeshire…
Something to think about now is what problems might occur when climbng that you need to sort out. Remember, once you’re more than a pitch up you can’t simply lower an injured climber to the floor, and once committed, escape might be difficult – you may need to abandon gear if retreating. The techniques need to be learned are many and varied, and that’s another article. Better still, book on one of our “Self Rescue for Climbers Courses“! However, have a think about what kit you have and how it can be used to sort out problems. Remember we had 2 prussik loops from our trad starter kit list as well as some slings. You will need to double the amount of screw gates we mentioned (your going to need enough for 2 belays on multi-pitch climbs remember)!
The world of Multi-Pitch Climbing opens up so many possibilities for you, and is a vital stepping stone if you want to head into the Mountains, the Alps and further afield. Perhaps you’ve aspirations to go Big Walling? Maybe it’s Winter Climbing? Either way, this is it! You’re well on your way to being a proper climber!
Joey on the sharp end and pushing her grade on some adventurous Pembrokeshire sea cliff multi-pitch climbing!
If you come on a course with us you’ll receive a 15% discount voucher for V12 in Llanberis – one of the best climbing shops going!
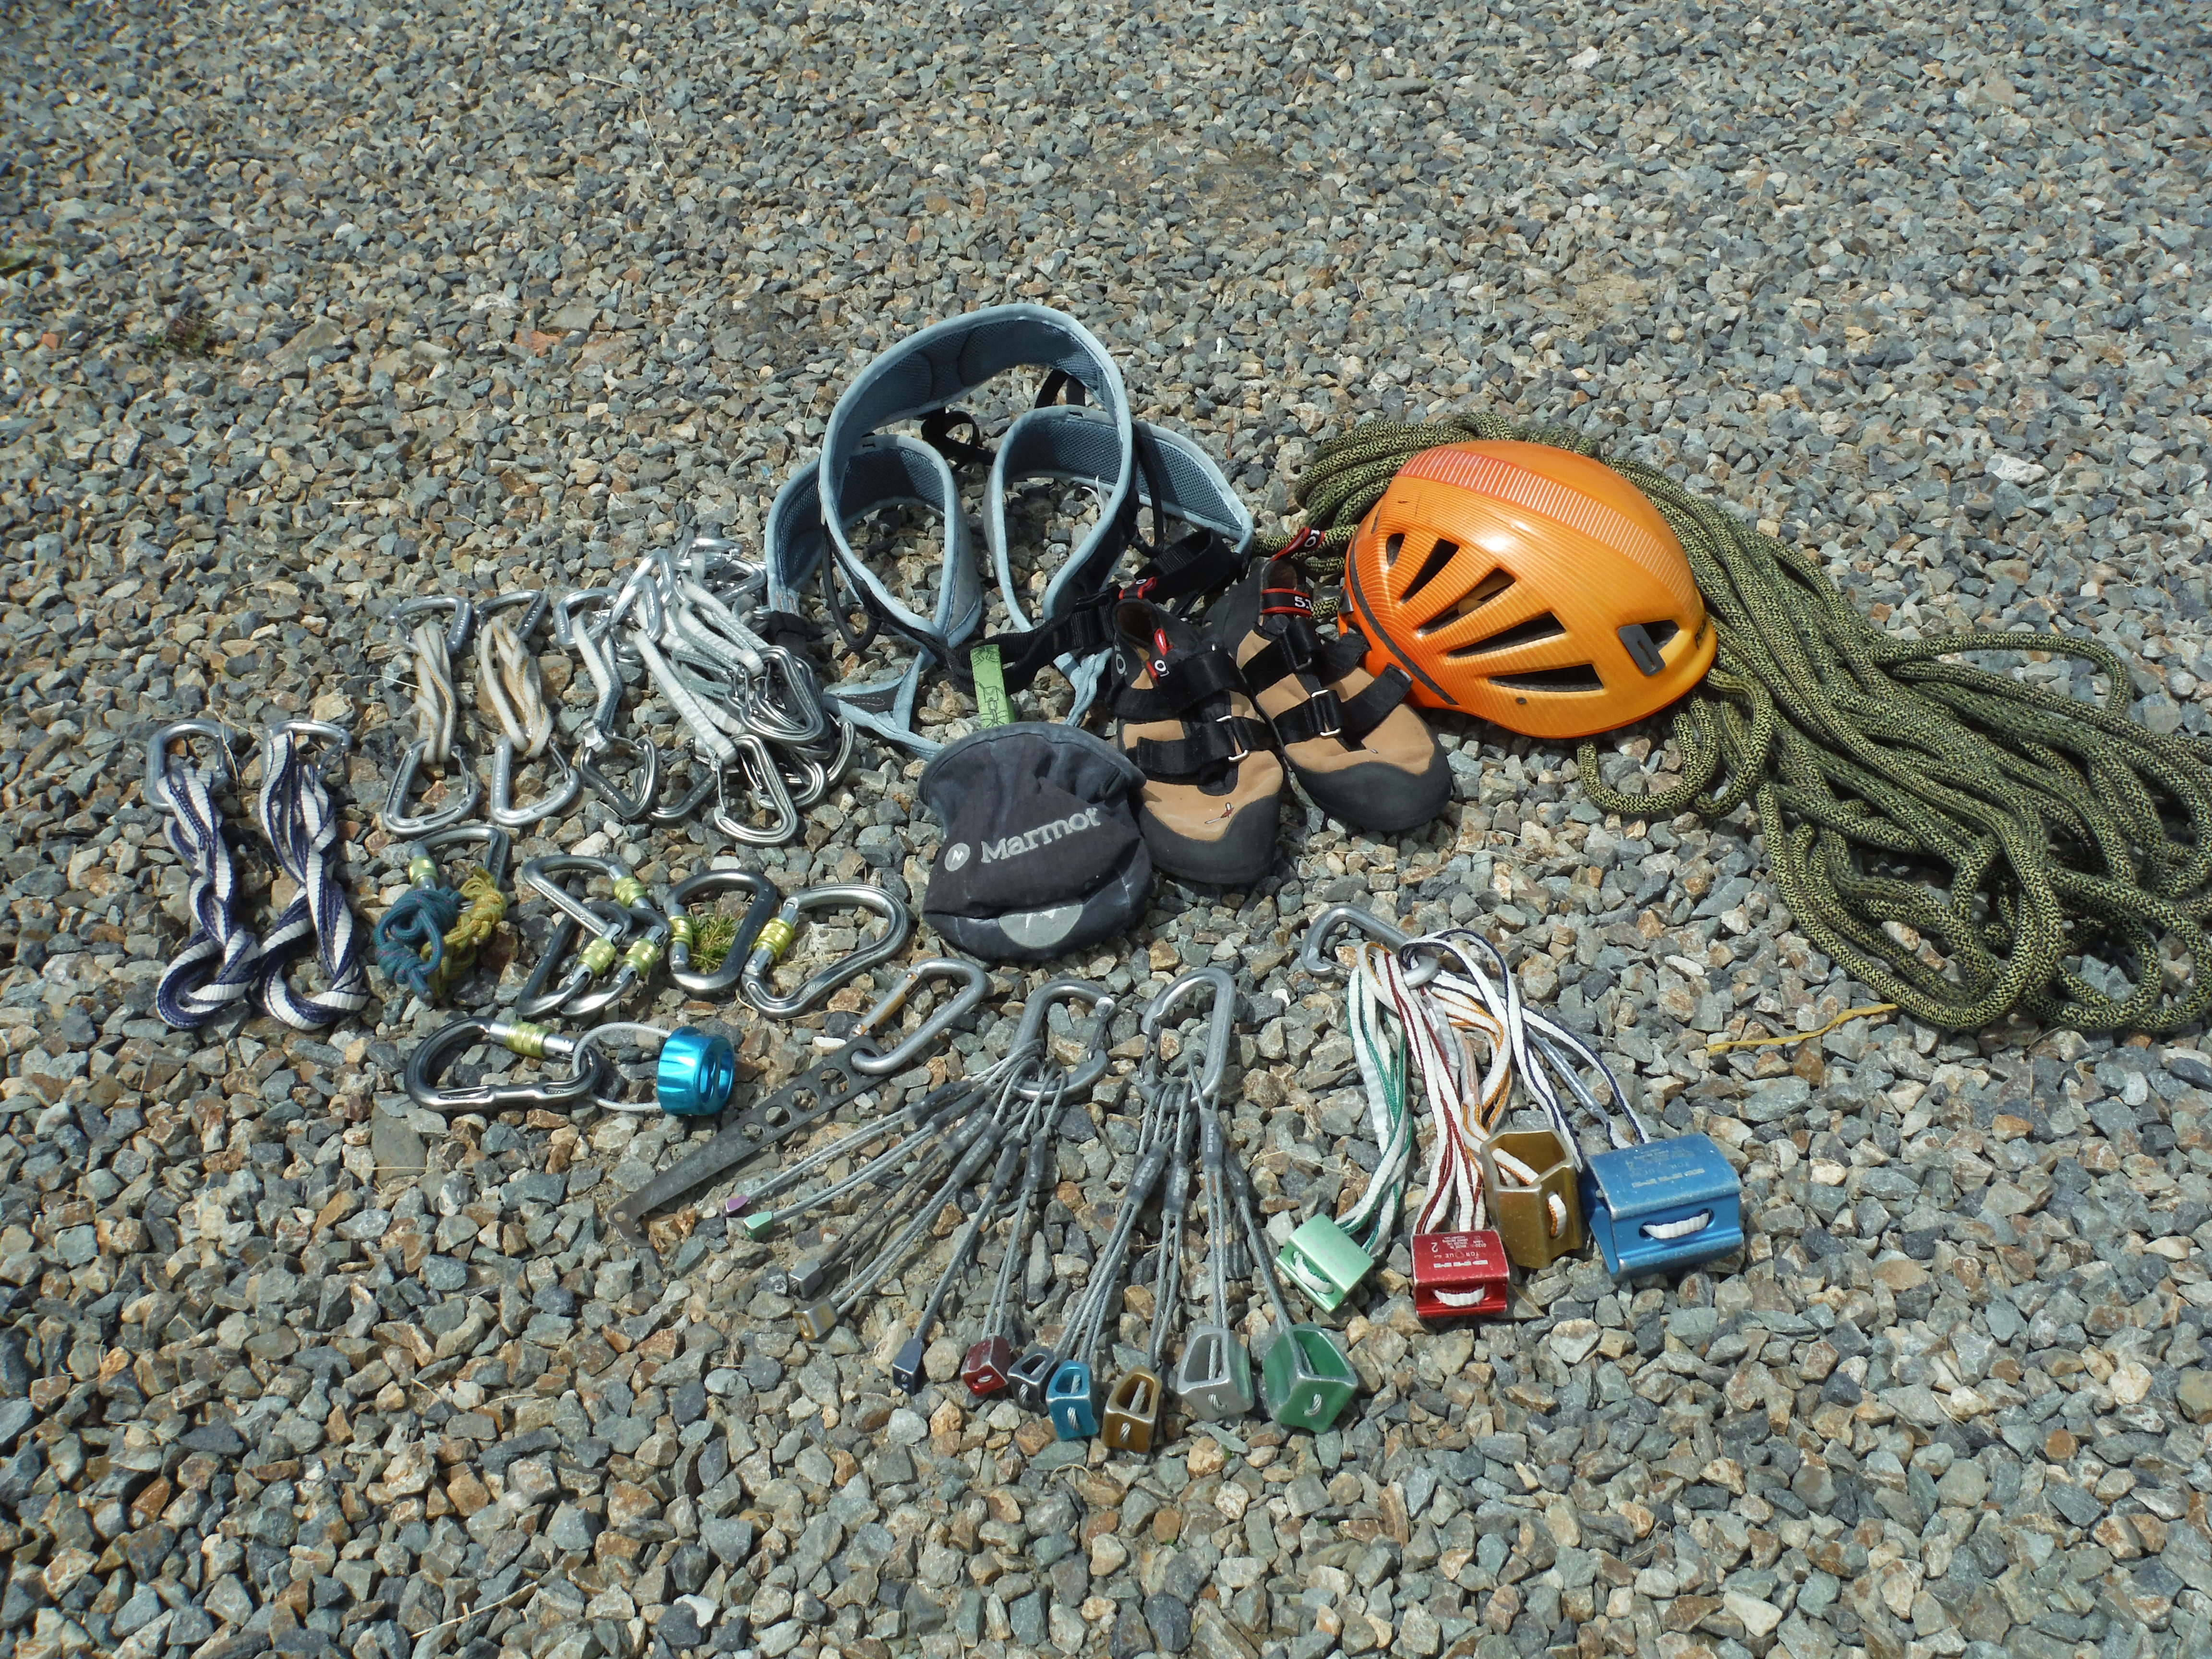
So, you’ve taken the plunge to start Trad Climbing! It’s probably going to be the start of a life-long obsession, so you’re going to need some good kit! Go into your local climbing shop and you will be confronted by a vast array of funny shiny metal things, and probably a sales assistant looking to sell you all the latest flashy kit. It can be a bit bewildering, but actually it’s pretty simple if you know what you are looking for!
Starting Trad Climbing – What climbing kit do I need?
Shoes need to be comfy but snug, there’s a good possibility you’ll be spending more time in them now, on the sharp end, so perhaps give yourself that little bit of extra room, at least until you know exactly what suits you. If you find the right pair they can be tight AND comfy! We most definitely should be wearing a good helmet when we are trad climbing, if you’ve not already got one, check it fits well with and without a warm hat or Baseball cap for those bright days). The cycling style “polystyrene shell” types (eg Petzl Meteor) are amazing and light, but the “harder shelled” helmets (eg Petzl Elios) might take a bit more abuse…
Your fancy sport climbing belay device wont be any good here, stick with the normal belay plate, such as the DMM Bug, or Petzl Reverso. Your harness wants to be fully adjustable, you might be climbing in a T-Shirt on the sun soaked sea cliffs of Pembrokeshire, or the windy chilly mountains of Snowdonia fully laden in fleeces and waterproofs, the other consideration is does it have plenty of well distributed gear loops for all the stuff we are about to clip on it?!
Now how about the rope… I covered this in last weeks sport climbing article so will gloss over it a bit here. You need a single rope, 50 or 60m. Simple! Shorter and you wont have enough for longer pitches (remember you use lots of the rope in the belay) and too long and you’re just carting around extra rope (unless you’re off sport climbing abroad, then go for a longer one!) . When you start multi-pitch climbing there might be better alternatives (half ropes), but for now, lets stick with singes… Don’t get too bogged down looking at the elongation, falls tested etc etc… They’re all going to do the job well, but some will last longer than others, may be dry treated and handle nicer through your belay device… I would persoanlly say I’ve found Mammut to be the best, but there are other options out there.
Now for the fun (but expensive!) stuff – the ‘rack‘! You will most likely have a set of draws, some slings and crabs if you’ve been sport climbing already, and so hopefully your already at least part way to owning you own rack, but I will go through all the bits and pieces here so you can have a stress free shopping experience…
This starter rack is aimed at someone who is going out and climbing on simple, shorter climbs, if you start multi-pitch or sea cliff climbing there is yet more kit to acquire, and when you start leading trickier climbs there is different kit you may benefit from, but that’s for another article. For now, it’s the simple, basic stuff. If we learn to use well and form the solid foundations to keep us safe in our climbing careers, it will last for a long while… Not sure what those skills may be? Check out our courses here….
Trad Climbing Starter Kit
There will be a big difference in the cost of the kit you are buying between the budget and premium brands. It does all have to pass the same safety tests to be sold in the UK. You may come across some very cheap stuff on the internet from eastern Europe/China, this might not be 100% safe, and perhaps hasn’t got the UIAA/EU kite mark seal of approval and CE stamp (but may have a dodgy China Export C E mark!!!), so probably best avoided. The same goes for second hand stuff. Anything with fabric in it, is in my mind, a big no-no, you just can’t be sure of its history. Metal is less prone to having unseen faults, but this is stuff you will be using for years to come so why bother trying to save money when it might just save your life?! Buy new, buy decent, be safe!
Quickdraws, or draws, are what we clip to the protection we place in the rock, and then to the rope. Basically a short sling with a snap gate at each end. If we carry around 12 of these, you can see how the weight will soon start to add up massively. For this reason I would go for a nice lightweight draw. You often get them in packs of 5, and in different lengths. You don’t want too many short ones, as they give us less chance at extending the gear enough to avoid rope drag. DMM do some excellent sets at varying lengths, look at the Spectre or super light Phantom draws. The middle and longer sizes are best, the short ones are more aimed at sport climbing. Its probably best to stump up some cash and get 2 sets of 5 so you have ten dedicated draws in total. It sounds a lot and seems expensive, but relate it to how much protection you can put in to keep you safe! Also worth getting, are a couple of sling-draws, these are 60cm clings with a snap gate at each end, giving you a couple of really long extenders put on crucial bits of gear to avoid drag. Go for dyneema as it’s so much lighter. There is a fancy way of folding them up so they are short on your harness, google it or get in touch with us! Some people will fix the snap gates on with rubber bands, I’d rather leave them loose and have them fully useable for other things.
Trad Climbing
Right, lets talk nuts. These are the wedged shaped metal objects you insert into cracks, then clip the draws onto these. They are your bread and butter of protection. Too many people rush out and buy all manner of fancy kit and skip through the important stuff. Spend time climbing with nuts and nuts alone, learn to place them well and efficiently, and one day it will save your life. Don’t do this and, well, what’s the worst that could happen?! I see far too many people placing utterly useless protection that wouldn’t hold a bag of peanuts let alone a ten stone human flying through the air. All you need to start out are a set of decent nuts. Go DMM or Wildcountry, both do a 1-11 set. You will want more eventually (or just buy 2 full sets now!), but for smaller easier climbs that’ll do, plus a couple of snap gates (go oval wire gates, not too many wires in each) to rack them on. They are now lighter than ever, and colour coded, so learn what colours equate to what size crack, place loads, keep yourself safe, test placements on a top-rope to see what works, and always think “what’ll happen if I fall of now?”… I’m a huuuuuge fan of the DMM offset nuts, and would wholeheartedly recommend getting a set of those too! Also worth looking at, for the easier traditional routes, is a set of slightly larger hexes to cover the cracks that your biggest nuts won’t work in. DMM do the Torque Nuts, Wild Country do the rock-centric’s, and don’t forget a snap gate to rack them on.
Eventually you’ll want to get some cams/friends, but I recommend dialling in passive protection (nuts etc) first. There is more judgment involved when placing cams (active protection) and I routinely see climbers placing them poorly. Certain rock types may require more cams (parallel cracks of gritstone for example). Many companies do sets of sizes 1-3, including half sizes, which is a great starting point, but initially I wouldn’t worry about going smaller or bigger.
When you’re setting up at the top after leading a route, you will be placing enough gear to make yourself a solid, bomber belay. You will ideally have a d shaped screw-gate carabiner for each of these, so lets say 3, plus 1-2 HMS carabiners (go for something big, like the DMM Boa) for clove-hitching yourself to the belay. We wont get into the debate over snap-gates/screw gates here, you’re just starting out, so be belt and braces, make everything perfect, give yourself a margin for error, and when you know the ins and outs of what you’re doing then you can make an informed decision.
You will need a few 120cm slings, maybe a 240cm one, for threads, spikes or equalising two bits of gear, go for dyneema as it’s much lighter and more compact, plus a snap gate each…
You will need to retrieve stuck bits of gear (both leader and second should carry a nut key). There is a change you might start thinking about abseiling, and perhaps getting a specific abseil rope. perhaps it’s the best way off of the route you’ve just done, maybe you’re sea-cliff climbing.. Either way, you need to back yourself up with a prussic loop, get two, made out of 5mm cord, tied with double fisherman’s with plenty of tail on the end, around 35cm long once tied, plus a carabiner to rack them on.
As you can see, this kit soon adds up to a big old rack! Hopefully it’s a bit clearer now as to what to get. It is undeniably an expensive hobby to get into, but the amount you will hopefully be using it will make it all worth while! Looked after well it will last for years. Learn how to care for, clean and inspect your kit properly. It is there to save your life! Many people will have a regular climbing partner who they assemble their rack with to share the cost, some join clubs to use the club rack. Remember to join the BMC, they give you discount in some of the outdoor shops, public indemnity insurance, and help us look after and maintain our access to crags. They are our collective voice.
Now you’re embarking on the quest to become a trad climber, there are many new skills to learn, you need to go out and have some adventures, and you will forge memories that will be imprinted on the brain for many years. But remember, this is a dangerous hobby and it has the potential to all go horribly wrong. Learn the basics really well, don’t push your grade and rush ahead too soon, and remember to lower your grade and expectations from indoors or sport climbing. Stay safe, have fun!
Looking for a Learn to Lead Trad climbing course? Get in touch!
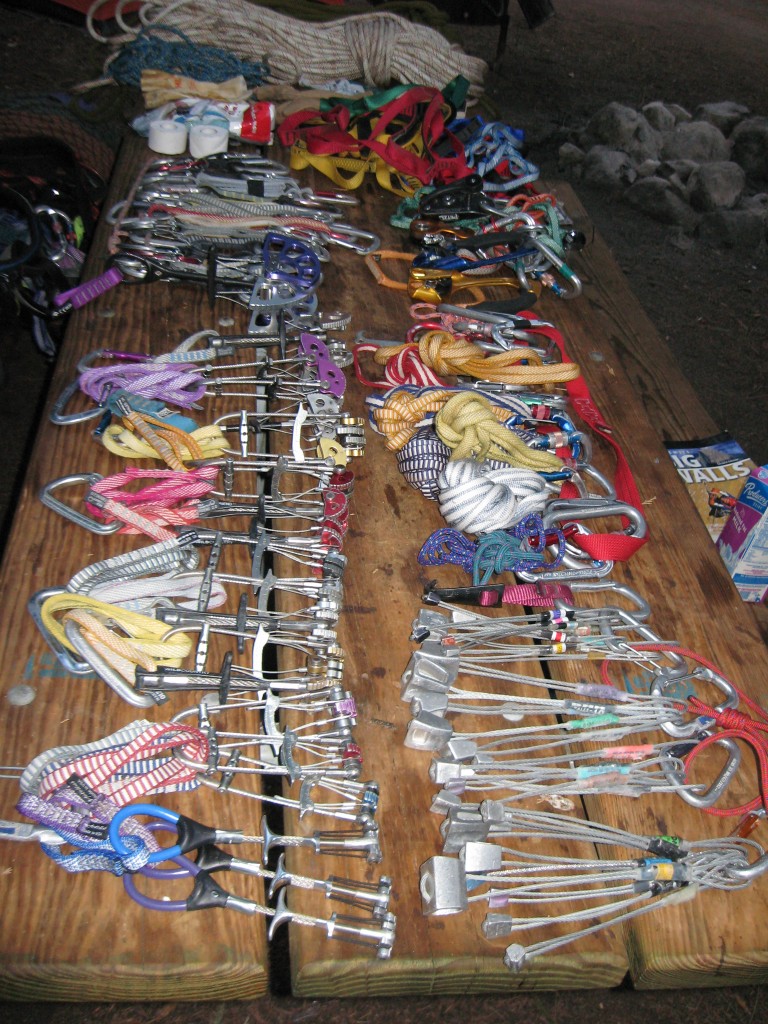
Not quite a Trad Climbing starter rack! Gearing up for some Big Wall Climbing in Yosemite…
Next time I’ll look at kit for multi-pitch and sea-cliff climbing…
If you come on a course with us you’ll receive a 15% discount voucher for V12 in Llanberis – one of the best climbing shops going!
In this article I’m going to cover what kit you might need if you were starting Sport Climbing. We’ve looked at basic climbing kit in a previous article so I wont go into detail on that here, but rest assured I’m sure what you’ve already got will be more than sufficient for moving to lead climbing at least initially! I’ll drop in any differences as we go along if it’s relevant.
There are lots of new skills to learn for sport climbing, such as lowering off, how to clip properly, what to do if your rope isn’t long enough and the climber can’t get to the ground! If you need any coaching, book on a course with an MCI like myself…
Sport Climbing – how would you get your quickdraws back on a steep route like this?!
There is a huge choice of belay devices out there, and some are pretty useful when it come to sport climbing. Your trusty old bug from the last article, will 100% do the job, and you certainly don’t need to replace it with another expensive bit of kit, but an “assisted breaking” device, such as the iconic Gri-Gri, can make your life easier. When someone is taking lots of falls, or resting lots on the rope (as seems to happen all too often when it’s me sport climbing!), the belayer may appreciate that little bit of help… (especially if the climber is as heavy as I am!) Now it’s super important to remember these devices, and there are lots out there, are NOT automatic fall holders – merely “assisted breaking” and have all been known to slip. So get amazing at using them properly, developing your skill as a belay doesn’t stop once you’ve learnt simply how to belay, and there are a whole host of new techniques and skills to learn. So borrow a mates Gri-Gri, check out the Click Up, the Mega Jul, The Eddy and the Smart – and see what works for you and learn all there is to know about your chosen device!
Your harness, so long as it has gear loops, will most likely still be perfectly serviceable, and will definitely do the job. Something to bear in mind if your really getting into it and pushing your grade, there are some superlight sport specific harnesses out there. If every little bit of weight loss counts for you, they have thinner tape, less buckles – but generally wont be amazing for other types of climbing due it being less adjustable and less durable.
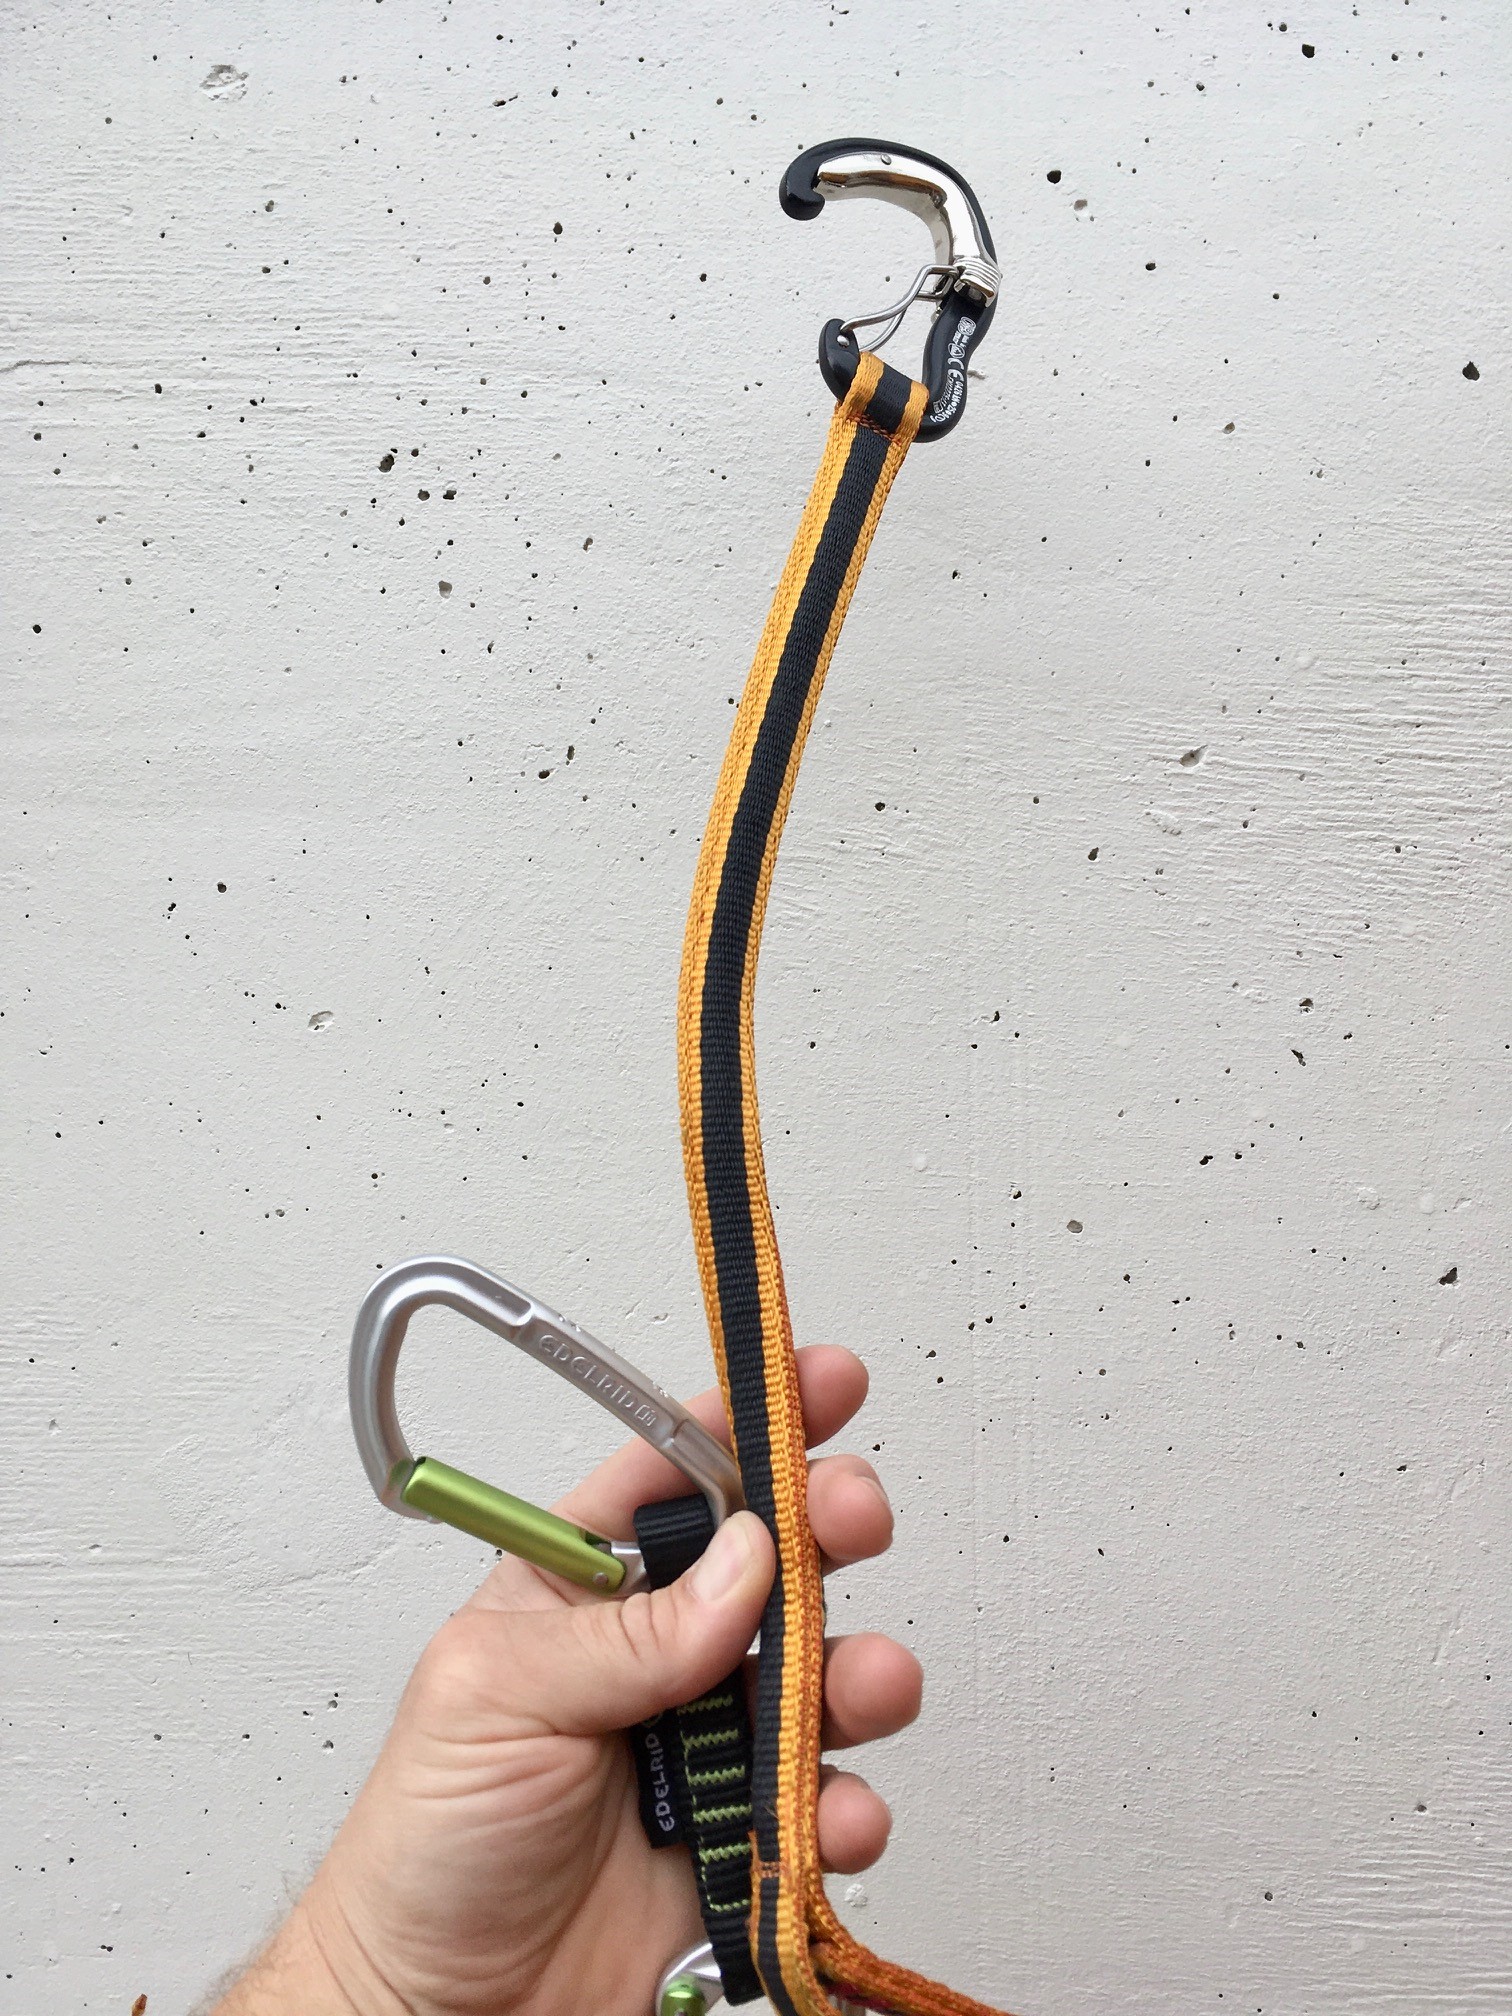
To go along side the harness, sport climbers often use something called a lanyard… There’s different options here and it can be a contentious subject – some people opting not to use one at all. If you want to discuss all the pro’s and con’s at length get in touch! I’ll touch in it a little here:
Traditionally a lanyard is length of sling attached to your harness to allow you to clip into a belay station or lower off and be attached via your harness immediately. With this set up, bear in mind that a sling has no shock absorbency in it, meaning that if you fell on it once its clipped into an anchor, it would at best hurt, at worse be catastrophic. They are designed to take a static load, and are simply for hanging on. Don’t EVER be in a fall situation clipped into the anchor directly by a sling. A lot of people will use this method, but there are newer (BETTER!) options out there.
So if you want a lanyard, why not use a length of dynamic rope, in a custom made set up like the Petzl Adjust Connect? Easy peasy to adjust, is dynamic – what’s not to like?!
Another option if you’re just going to lower off a single pitch route is to not bother with a lanyard at all and use the draws in an appropriate way. Different options for different situations – but use something dynamic and understand the system!
Chappers leading a Sport Climb near Wanaka in New Zealand – note the use of the Daisy Chain – maybe in the past I might have used these but they stay firmly in my Aid Climbing kit now!
So if you’re starting leading, you obviously need a rope! There is an overwhelming choice out there, but all you need is the right length of single rope. I will go into more detail on the different rope types in a later article, but a single rope is one that you use on its own and clip it in to all the protection. It is shown on the rope marker as the number 1 in a circle. If you’re indoor on a wall that is 12 meters high, all you need is double that length, so you can be lowered to the ground from the top, make sense? Ropes usually come in 30m, 50m, 60m and 70m lengths, giving you an idea of the length of route you could do! If you’re just climbing indoors you could get away with a short rope (some walls are pretty big mind!) whereas if you’re thinking of a trip to Kalymnos, a 70 or even 80m might be more appropriate. Check the route length in the guidebook before you set off, a good habit to get into is to tie a knot in the other end of the rope so it cant pass through the belay device if it’s too short..
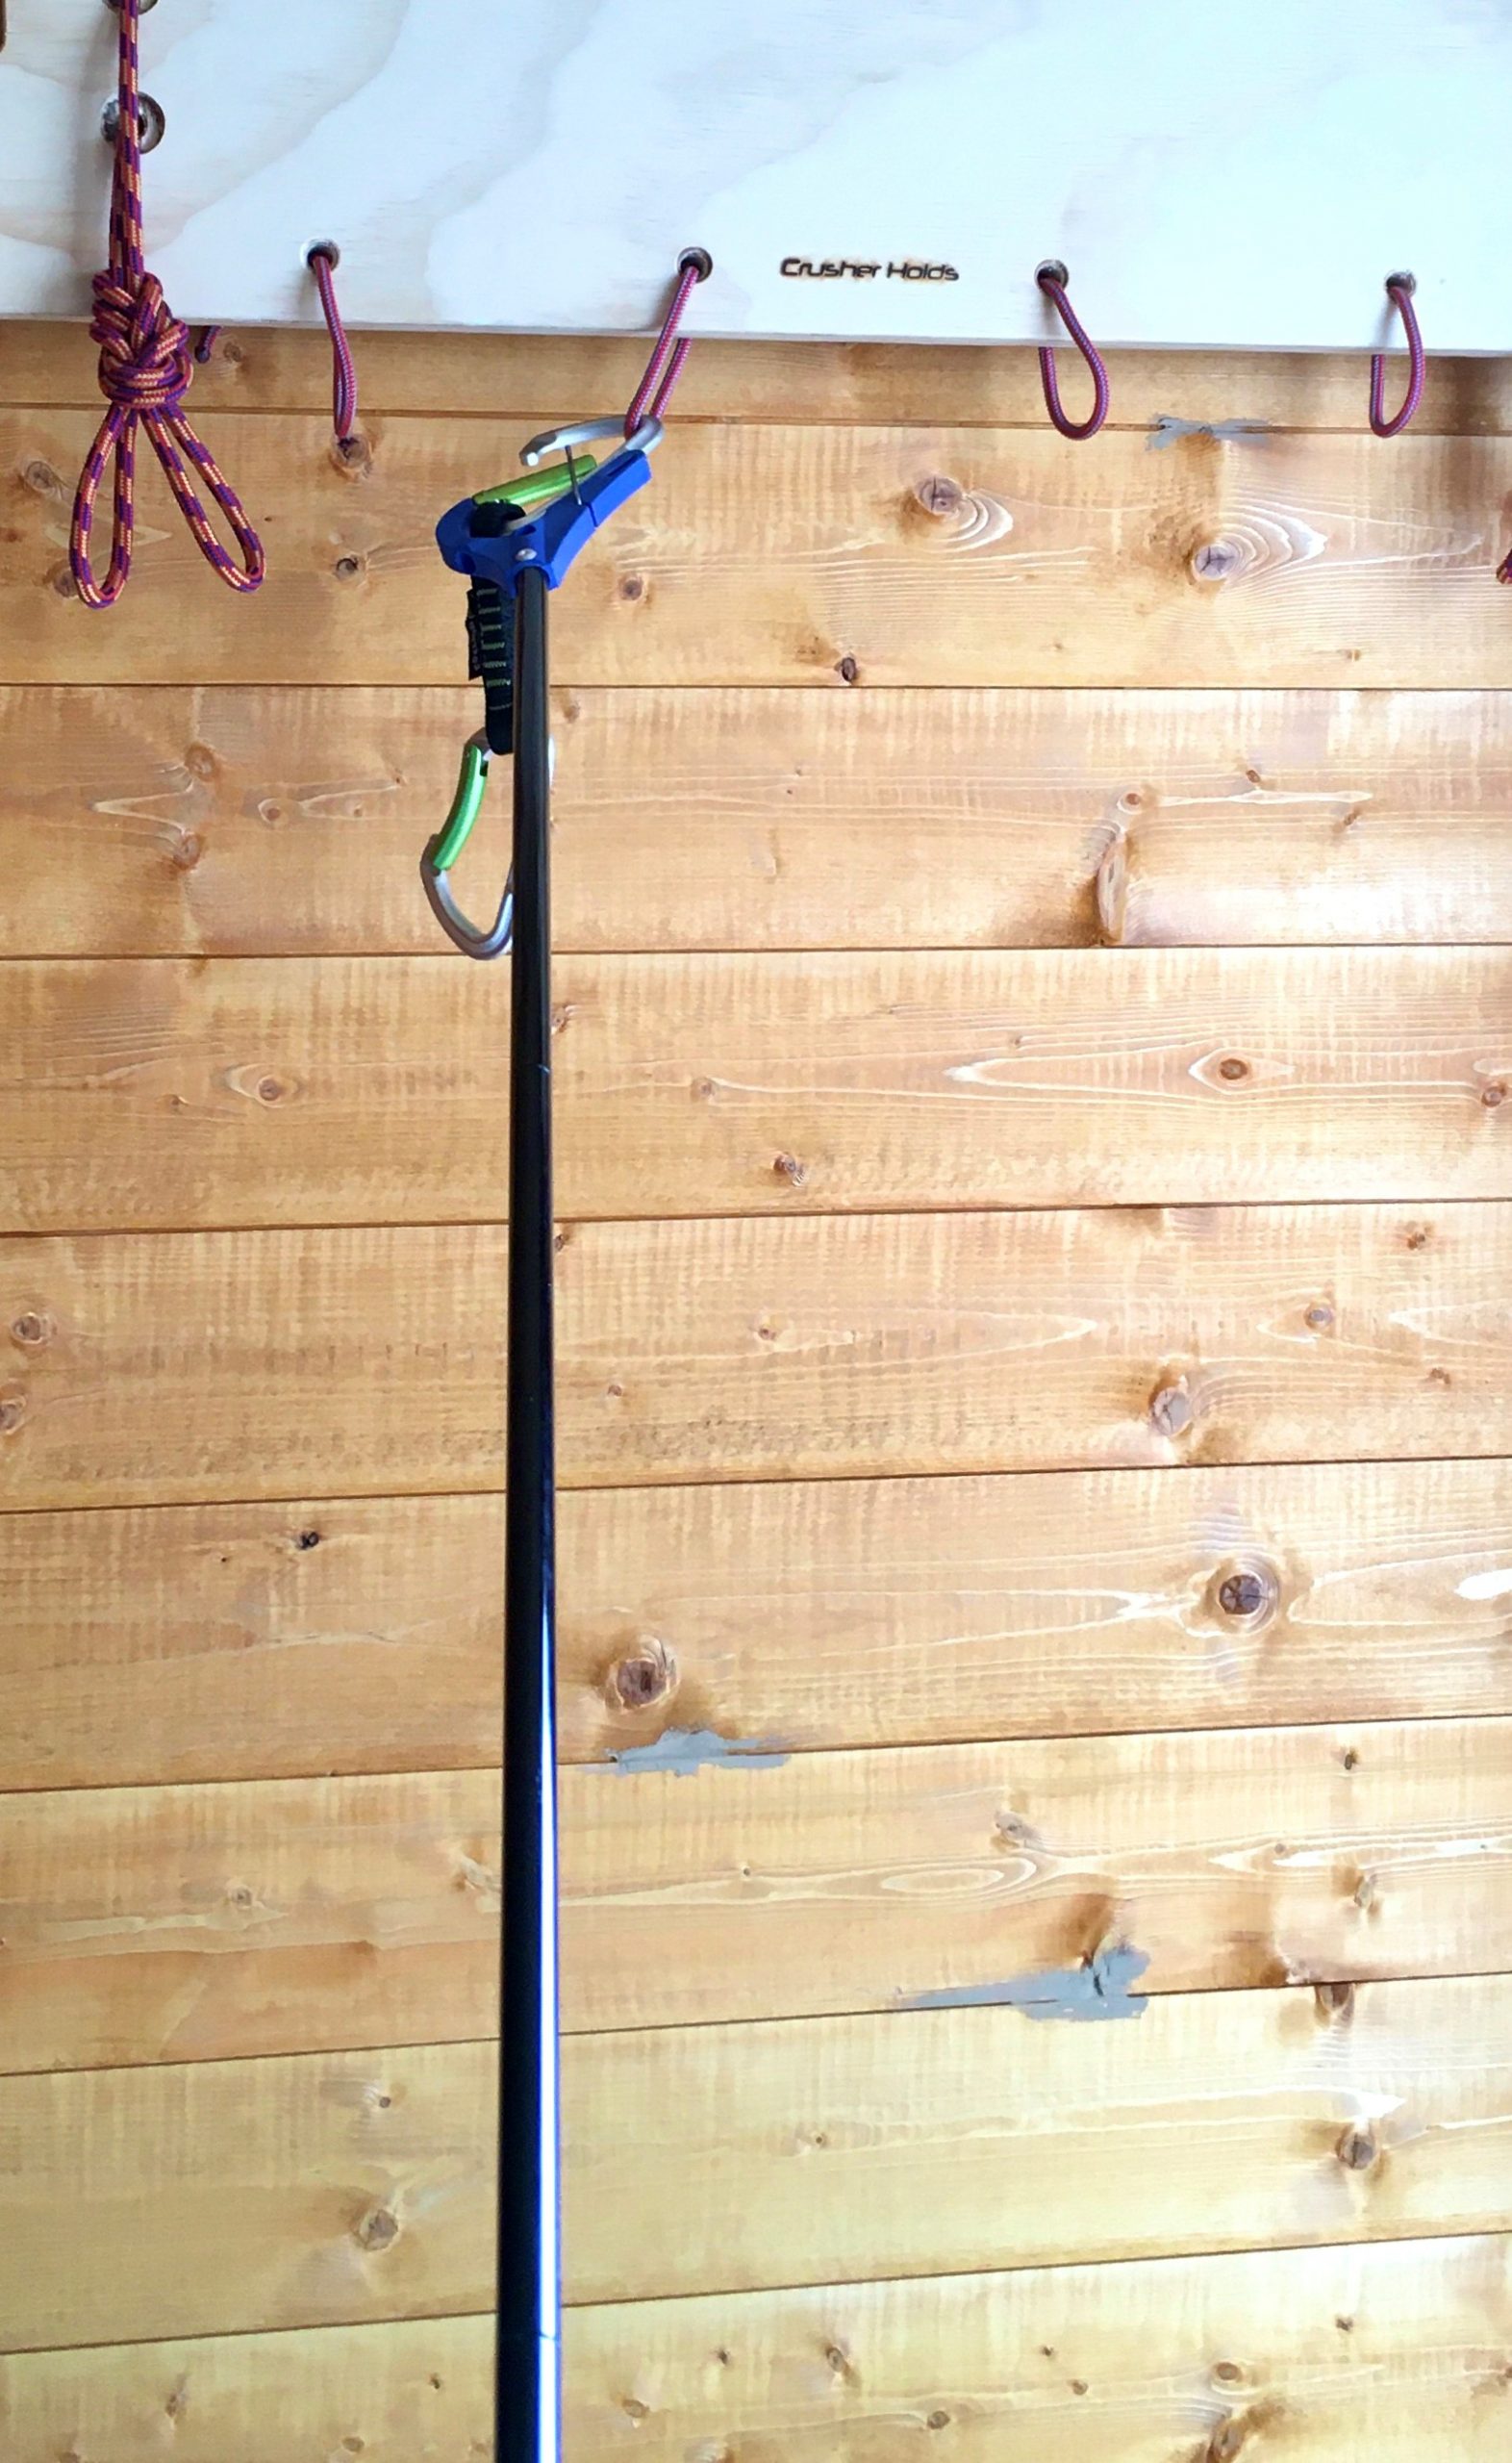
We clip quick draws onto the bolts, and attach our ropes to these. There are sport climbing specific “draws”, which tend to be beefier (and much heavier), but any draw will do, and I would go for an all round one for other climbing unless you’re going to specialise… Cutting the weight down will make your life easier when it comes to other types of climbing. How long a draw do you need? Short draws are fine for sport, but you’ll occasionally appreciate some longer ones and I’d get a bit of a mix for your progression to trad climbing anyway. We will look at why in a later article, but basically it’s all about rope drag! You will need enough for however many bolts there are on your chosen route. Get 10 and see where to go from there. DMM do an excellent range of each… Check out the pic below of the sneaky reachy draw as well! A great option if you have a grip clip you cant quite reach…
Useful sport climbing quickdraws – note the extra reach gained from the stiffness of the draw on the right.
A few other bits and pieces we need, firstly a couple of screw gate carabiners for clipping at the top if you want to top rope or work the route so we don’t wear out the fixed bolts and lower offs. Some people use 2 quickdraws for this, making sure the gates are opposite. As we are climbing outside, it is prudent to wear a helmet, despite the fact you rarely see sport climbers and the guys in the magazines wearing them. Along side the risk of hitting your head in a fall (sport climbers often get inverted in falls), the tops of many UK sport climbs are tottering piles of choss! Luckily the lower offs are usually placed below these sections! A clip stick is something to think about, reducing the risk of a ground-fall from the first couple of clips, and enabling you to clip your way up a route that you may want to work. I often take an old snapgate or maillon to put on a bolt if I cant get to the top and have to lower off, to save leaving any expensive kit…
Clip Stick – a vital sport climbing tool!
So there we have it, a whistle stop tour of the kit you might need if you are getting into sport climbing. Sport climbing is easy tov get into – safe-ish, means you get a lot of climbing done in a day (or non at all if you’re working a route!) and there are some amazing destinations both a short haul away and further afield in some exotic locations.. Either way, there’s climbs out there at every grade and amazing adventures to be had, so et the right kit, get the right skills, and have fun!
Drop us a line if you’d like to learnt the skills on the amazing Gower Coast (Pembrokeshire is RUBBISH for Sport Climbing!)
Coaching Sport Climbing in Spain
If you come on a course with us you’ll receive a 15% discount voucher for V12 in Llanberis – one of the best climbing shops going!
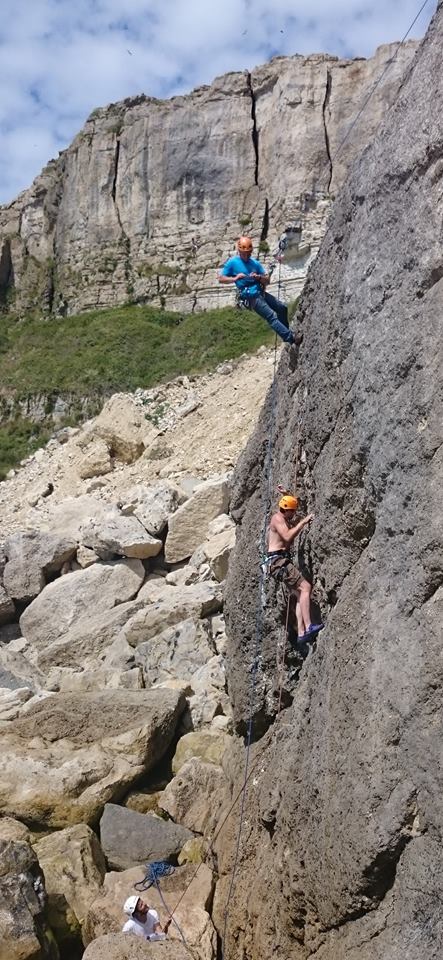
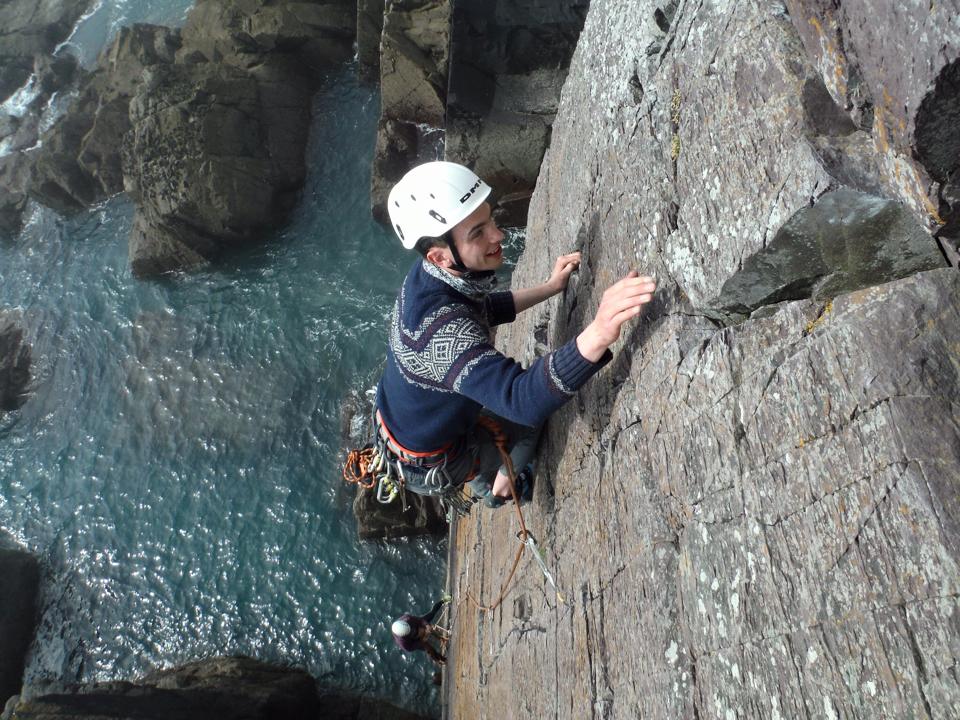
This article details loads of the sea cliff climbing skills you’ll need to plan and survive a day out climbing on the sea cliffs!
Sea Cliff Climbing Skills – all you need to know.
Before we get going:
CAN YOU? Prussic up a rope? Tie off your belay plate? Escape the system? Hoist a stuck climber? Ascend and descend past a knot? Lower past a knot? – These skills should be learnt by any Sea Cliff Climber, but there’s loads more to it! So, here’s the basics…
Most people don’t start out sea cliff climbing. For the majority, their introduction to climbing comes in the form of visits to a local indoor wall, before venturing out onto single pitch crags such as Stanage, where you can park your car, saunter the 5 minutes up to the crag (with full view of it at all time), peruse the guide book, do a route and casually wander round back to the bottom. Your weather worries are purely if the rock is dry or not.
It’s amazing and you can get so much done in a day – but what if you fancy having a go at some sea cliff climbing? It’s quite a big step up, with a whole plethora of new skills needing to be learnt, practiced and perfected in order to have a safe, productive day out. Even the smaller ‘single pitch’ sea-cliffs can catch the unwary out.
But given the right conditions, the right knowledge, the correct equipment and skillset, some of the best, most rewarding days of your climbing life can be had on the sea-cliffs.
In this article, I’m going to try to give a rundown of the new skills you need to develop and the things you need to take into account on them there cliffs…
Learning Sea Cliff Climbing skills on a course in Pembrokeshire
Before you go…
Tides, swell, bird bans, bombs, spring, neaps….
You might have come across some of these things before. Certainly, bird bans are rife on the crags – but nesting sea birds mean many crags are out of bounds at certain times of year. This one’s simple, get on the BMC’s amazing RAD (regional access database) and check out where you want to head. The same goes for military firing ranges, especially here in Pembrokeshire. Some are accessible outside of firing times, others you have attend a Range Briefing to be able to enter. Follow the RAD and BMC advice, plus local signs at the car-parks and cliffs themselves – we don’t want to damage our access…
Tides and the whole sea side of things aren’t so easy to get your head around…
The level of the sea goes up and down (tides). There’s a low tide, then 6 hours later there is a high tide. Repeat. The tides progress a little each day, so the times change. Dorset has funny tides, so is an exception to this rule. I’ll tell you where to find this info in a bit..
Every two weeks a full moon brings us Spring tides, and the range (difference between high and low) is at its greatest. In some areas this might be nine metres difference – I still can’t comprehend how the moon does this! When we are not on springs, the tidal range is smaller, and where the range is smallest we are on Neap tides. Having a knowledge of this is of vital importance if you’re going Deep Water Soloing, but to trad climbers it tells us if we can access the routes without having a hanging belay, or where to abseil into, and where the water level will be in relation to our route.
Note where the tide will come up to… Pembrokeshire’s large tidal range…
I don’t want to lose you with all this talk of water when we want to go climbing, but it’s useful to note that the speed the tide comes in and goes out varies as to what stage it’s at. This is important as it tells us “if I belay here now how long have I got till I get wet?”! This is called the rule of twelfths. I won’t go into much detail (Google it for more info), but basically there is a lull in the speed of water coming in and going out in the couple of hours around the peak of high and low tides, and it comes in quicker between these times. Sometimes disturbingly quick! At some point in your sea-cliff climbing career you WILL get wet due to this!
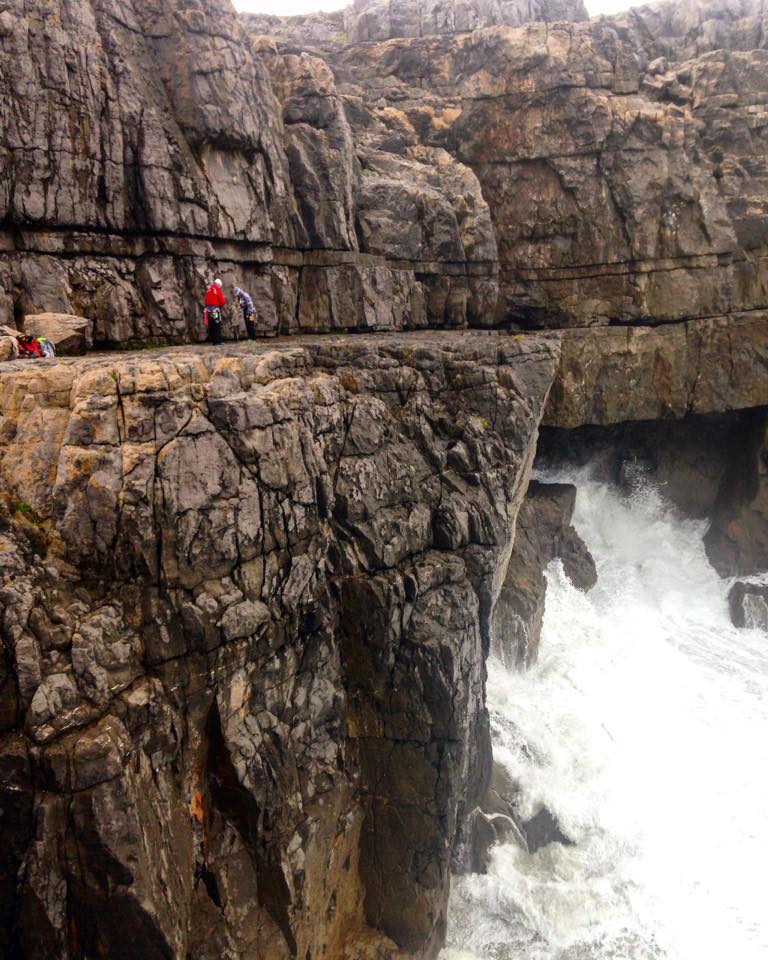
Swell. Sometimes it’s flat as a pancake, but at times the sea around our small island can produce some big old waves… Having a squint at the predicted swell height (or even a relevant surf web-cam) can save you from getting a soaking, or finding the rock wet even though it hasn’t rained…
The distance between the top of each wave’s high point is called the wave period. Wave period is measured in seconds, and can be low – for example, four seconds; or large, even up to twenty seconds or more. The longer the period, the more power in the waves, hence why a 3 foot wave on 4 seconds is a very different beast to a 3 foot wave on 18 seconds… Again, being aware of this can help you avoid a soaking! Even those belay ledges 30 feet up a cliff aren’t immune to getting wet!
Both the tides and the swell can be found on Magic Seaweed, a surf forecast website – just find the nearest relevant surf spot for the crag you want to visit. You may need to make some adjustments to get exactly the right tide times for your crag if it’s some distance from the surf spot. Tide tables can be found on the web or bought locally. An obviously just like the weather – this is only a forecast and things can be different!
Big Swell running near St Govans
Now then, let’s get to the crag….
1. Where is this cliff anyway?!
Well that’s the start of it – you can’t walk to the bottom of the crag (OK sometimes you can!) so you can’t see it until you’re on it. This means reading and interpreting the guidebook to find your route, or abseil line, is a fundamental skill. Guidebooks are getting better and better, but I have, on more than one occasion, wandered around for hours without successfully finding the place I want to be! So, take your time, analyse the book, tick off features as you go, perhaps look at the map and grid reference. And if you get lost or go the wrong way, don’t worry – we’ve all been there!
2. So I’ve found the cliff – what now?
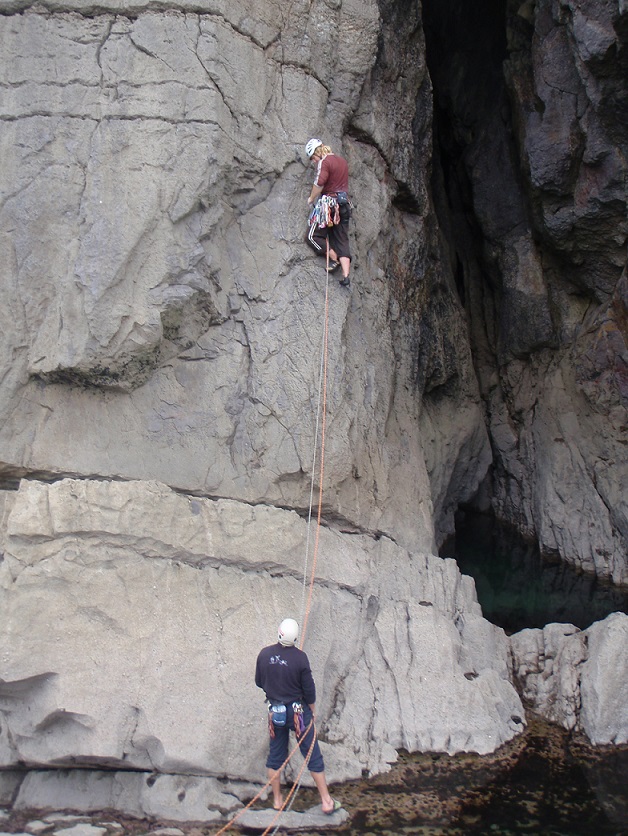
In the ideal world, there would be an easy walk or scramble down, but that’s no fun – so let’s look at how to use the rope to safeguard our descent. To abseil down would be the norm, leaving a fixed static rope down the ‘normal’ descent, which are usually indicated in the guide.
We tend to use static rope as it has less stretch than a lead rope, thus reducing the chance of it rubbing over edges. Using a rope protector and some good anchors is a wise choice! There may however be occasions when you have nothing but a rusty old stake in the ground as an anchor, so developing your own sound judgement is crucial.
What device you use to abseil down is up to you, but it’s imperative that you use a prussic to back yourself up (you may need to go hands free to set up a hanging belay etc). Don’t forget that all important knot in the end of the rope so you avoid the embarrassing situation of abseiling off the end of your rope.
Only use length of rope you need to get to the bottom to avoid tangles, but if you cannot see the bottom you may need to take the whole length down. There’s never any excuse for being sloppy and just chucking all the rope down. At some point in your climbing career this will get you in a spot of bother! Either carefully lower the rope or even better, abseil with it coiled over you or in a bag and drop it down as you go. If you stop to untangle the rope, build a belay or check out that crucial gear placement, be sure to tie a quick overhand knot in the rope below your prussic, as your hands-free back up.
Make sure the excess rope at the bottom is nice and neat, and will pull up from the top cleanly and not get caught. Be aware of the sea coming in and washing the rope away. If the tide is threatening, lay it on a ledge further up the cliff.
We leave the rope in-place should we need to escape back up it, if we can’t climb out for instance, so I often take a gri-gri and jumar with me. This will make your life infinitely easier should you need to ascend back up that rope. Learn how to use them properly, but also how to get back up safely with just a couple of prussics… This is a very important skill, if in any doubt about this or other skills mentioned here – book yourself onto a course run by a member of the AMI. I end up rescuing people on a fairly regular basis whilst I’m out working as they don’t have basic skills like these..
Often you might abseil down and find no ledge to stand around on. The safest thing to do is to stay on the abseil rope until you’ve made a belay (remember that back up overhand knot below your prussic if you go ‘hands free’). Consider using slings, or perhaps even the abseil line, to equalise the belay rather than the climbing rope if you’re doing a hanging belay as it can be handy to have a master point to clip into.. Just make sure your mate can still get down the rope and to your belay. Its much easier for the second to go down first and arrange the belay as that’s where they’ll stay, and for the leader to come down second, tie into the rope, get some gear in then come off the ab rope once they are on belay and hey-presto you’re good to go!
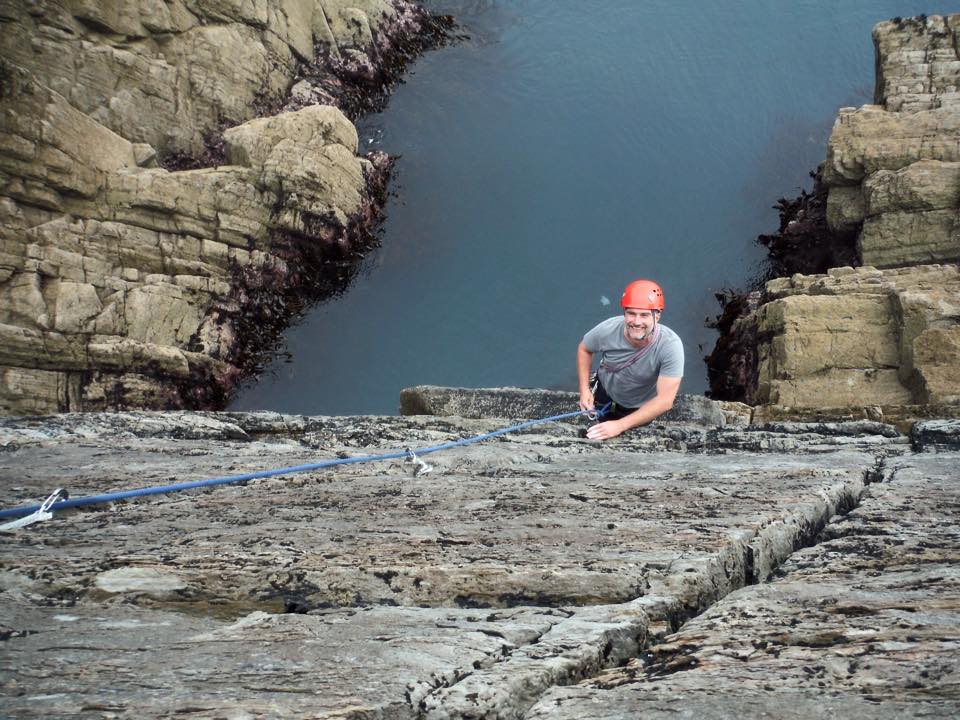
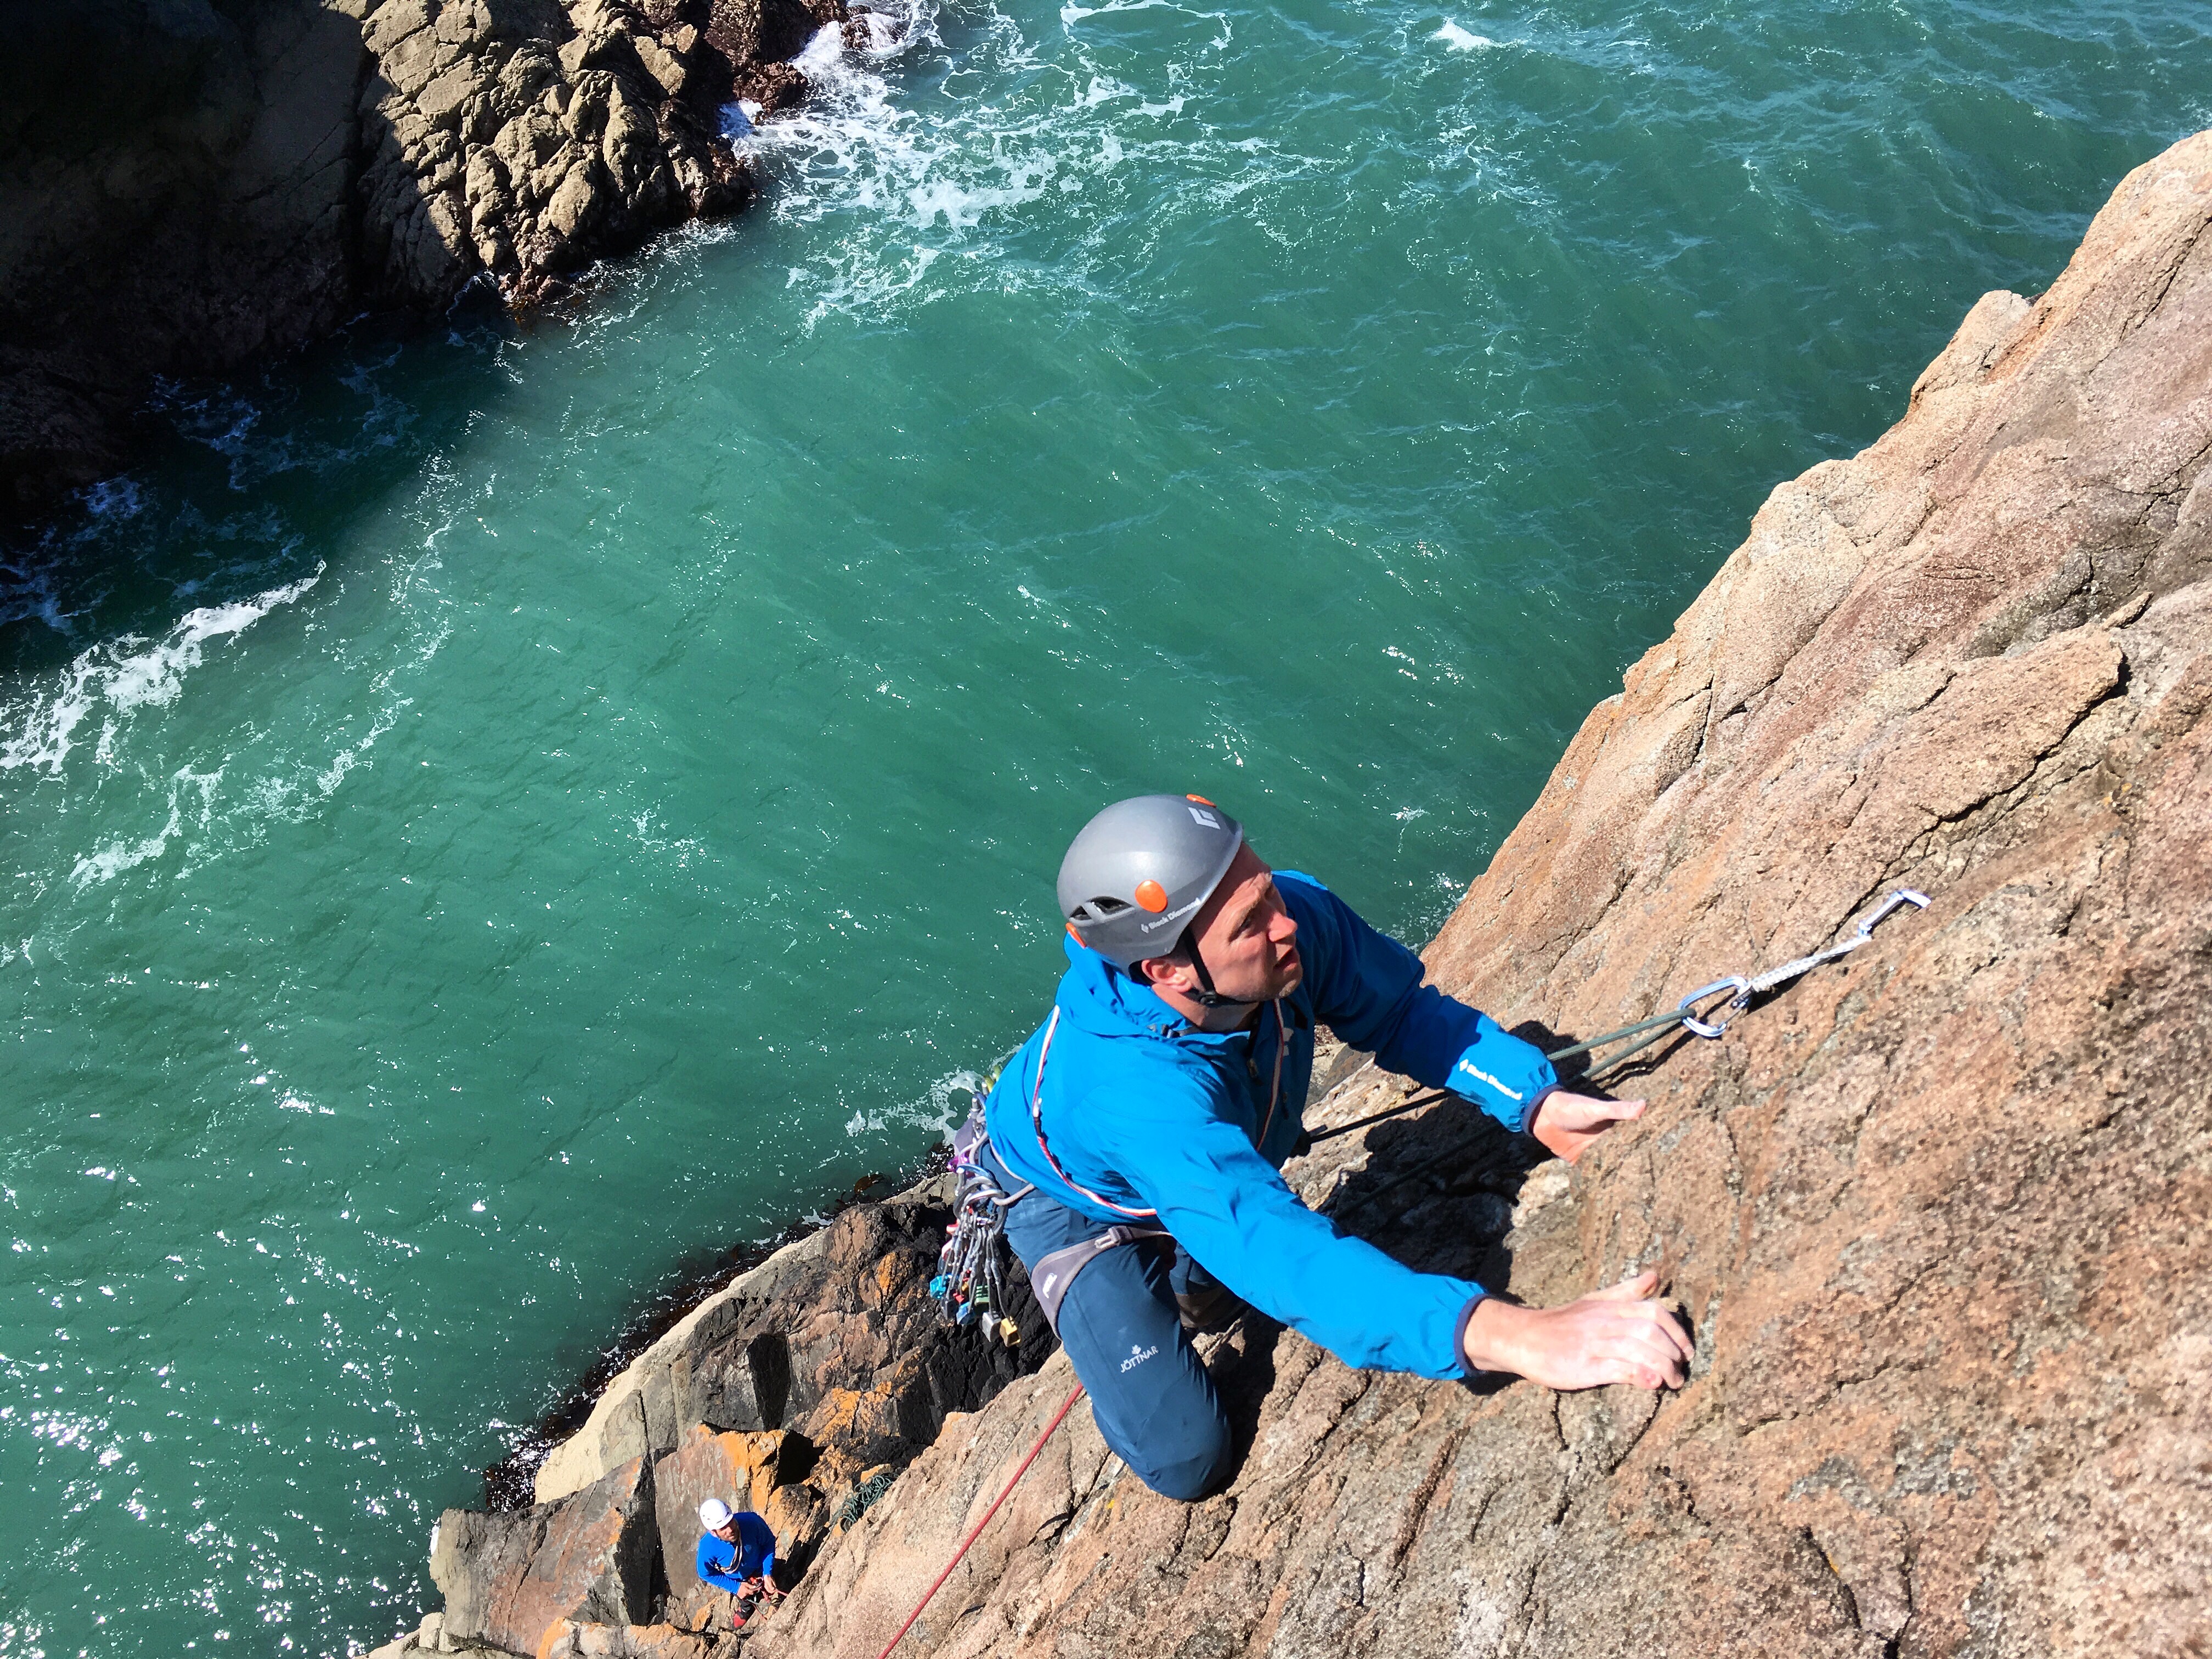
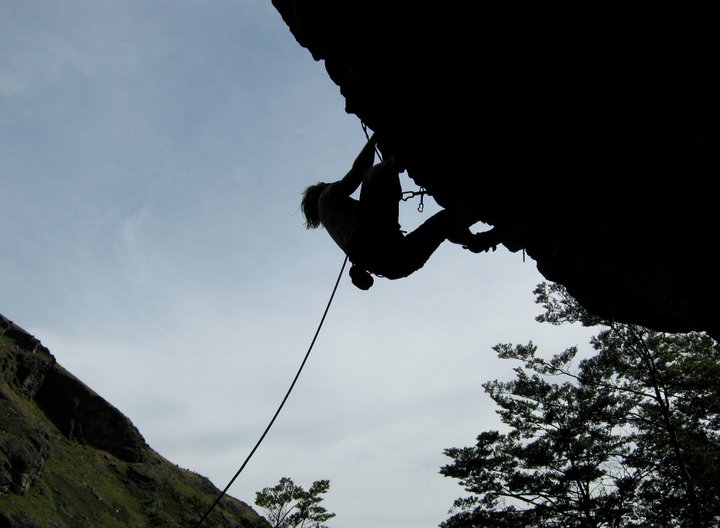
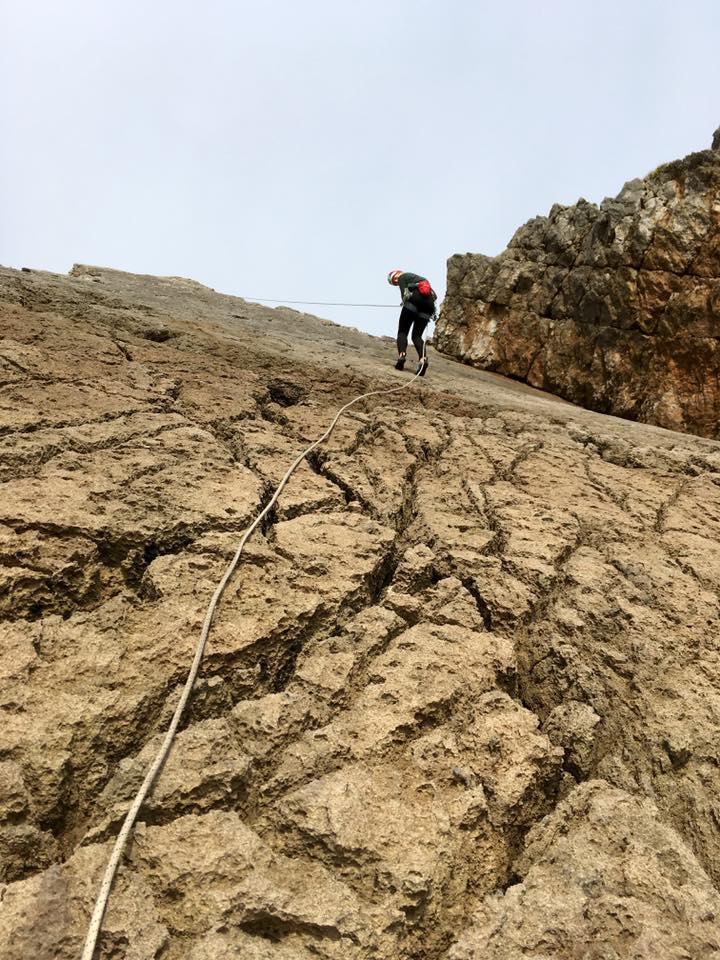
Abseiling into a Pembrokeshire sea-cliff
3. Let’s go sea cliff climbing!
Surrounded by thundering waves and cannon-like booming, or tranquil and azure waters with all sorts of marine life bobbing around, you will have very different experiences depending on the sea and weather conditions – but every experience will stick far more vividly in your mind than any trip to Stanage! A few words of warning here:
– Consider using a bandoleer if you’re moving around at the base of the cliff un-roped. If you fall into the sea with all the metal gear on your harness you will drown – at least you can whip off a bandoleer more easily.
– If un-roped at the bottom, be very aware what the sea is doing. Don’t keep your back to the waves the whole time. The unwary have been caught out by random large waves, never to be seen again.
– When seconding, leave the gear clipped onto the rope until it’s out of the rock when putting it on your harness. Ideally unclip it from the rope only after it’s safely on your harness. Kit dropped into the sea never to be found again can cause a costly day!
– Beware of birds! We’ve mentioned bird bans, but even cliffs outside of these can have resident birds. Hands in guano, projectile vomiting and dive bombing are all things you can look forward to…
– During seal pupping season it’s best to stay away from certain areas – or at least make no noise. Check locally where and when this is.
– Any fixed gear you come across (slings, pegs, old bolts and assorted ironmongery) will have been affected by the salt in the air. This will cause it to corrode much quicker than on an inland crag, so treat all with great respect and don’t assume it’ll hold a fall.
– As you can’t just nip to your bags, it’s worth having some essentials in pockets – maybe some food and a phone, certainly if you’re on a multi-pitch, so you can raise the alarm if needed. People have been known to spend entire nights on sea cliffs because no-one knew they were there and in trouble!
Perfect day for sea cliff climbing! Caerfai – Pembrokeshire
What if?
You’re on a big sea cliff remember? If you can’t get up the route you can’t just lower to the ground and walk away… Hopefully you’ve left your abseil rope in place and you know how to safely get back up it with your tail between your legs? What if your mate falls off and hurts themselves, or if the tide starts coming in quick and you get cut off?
Sea cliff climbing is probably, at least in part, so rewarding due to the increased seriousness of the situation you’re in. The “out there” feeling… But these climbs demand that you develop your skillset to be able to deal with certain situations should things go awry. These skills are best learnt under the watchful eye of an Instructor, as there is very real scope to mess things up and hurt yourself.
# CAN YOU? Prussic up a rope? Tie off your belay plate? Escape the system? Hoist a stuck climber? Ascend and descend past a knot? Lower past a knot? – These are just a few of the important skills to learn. Be honest with yourself and up-skill. It might just save you or your mates life one day…
Many cliffs are less serious, so pick your first forays wisely and you’ll be OK, you’ll have an unforgettable time and climb some truly amazing routes. Who knows, you might even see a pod of dolphins bobbing along as you’re belaying your mate with the sun shining in your face….
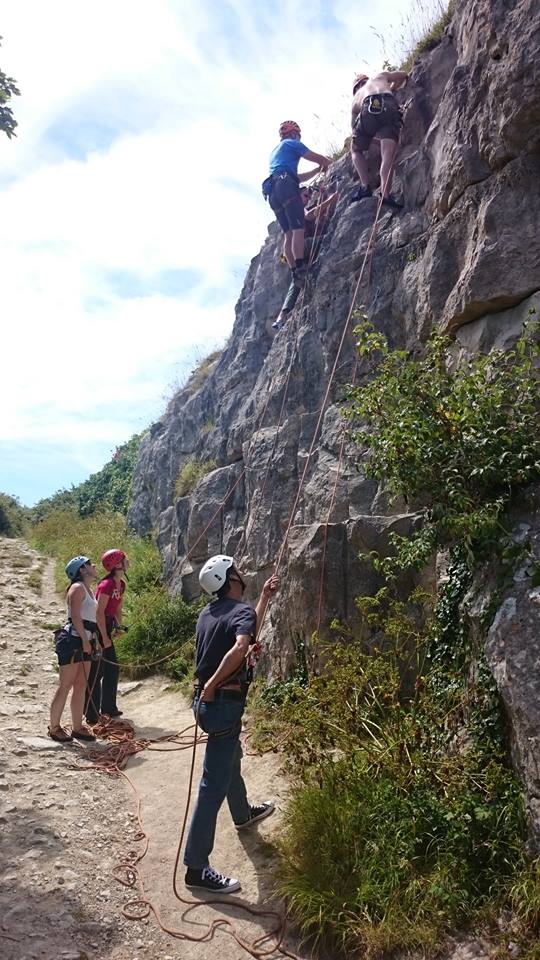
Teaching self-rescue skills to a group of climbers in Pembrokeshire
Ascending a rope on a self rescue course in Pembrokeshire